

I made more fruit pizzas than I care to admit before landing on this gluten free fruit pizza recipe. Too thin and the crust crumbled. Too thick and it was basically a jaw workout. But the lightbulb went off when I stopped trying to reinvent a sugar cookie base and just used my no-bake cookie recipe instead, and folks, we haven't looked back.
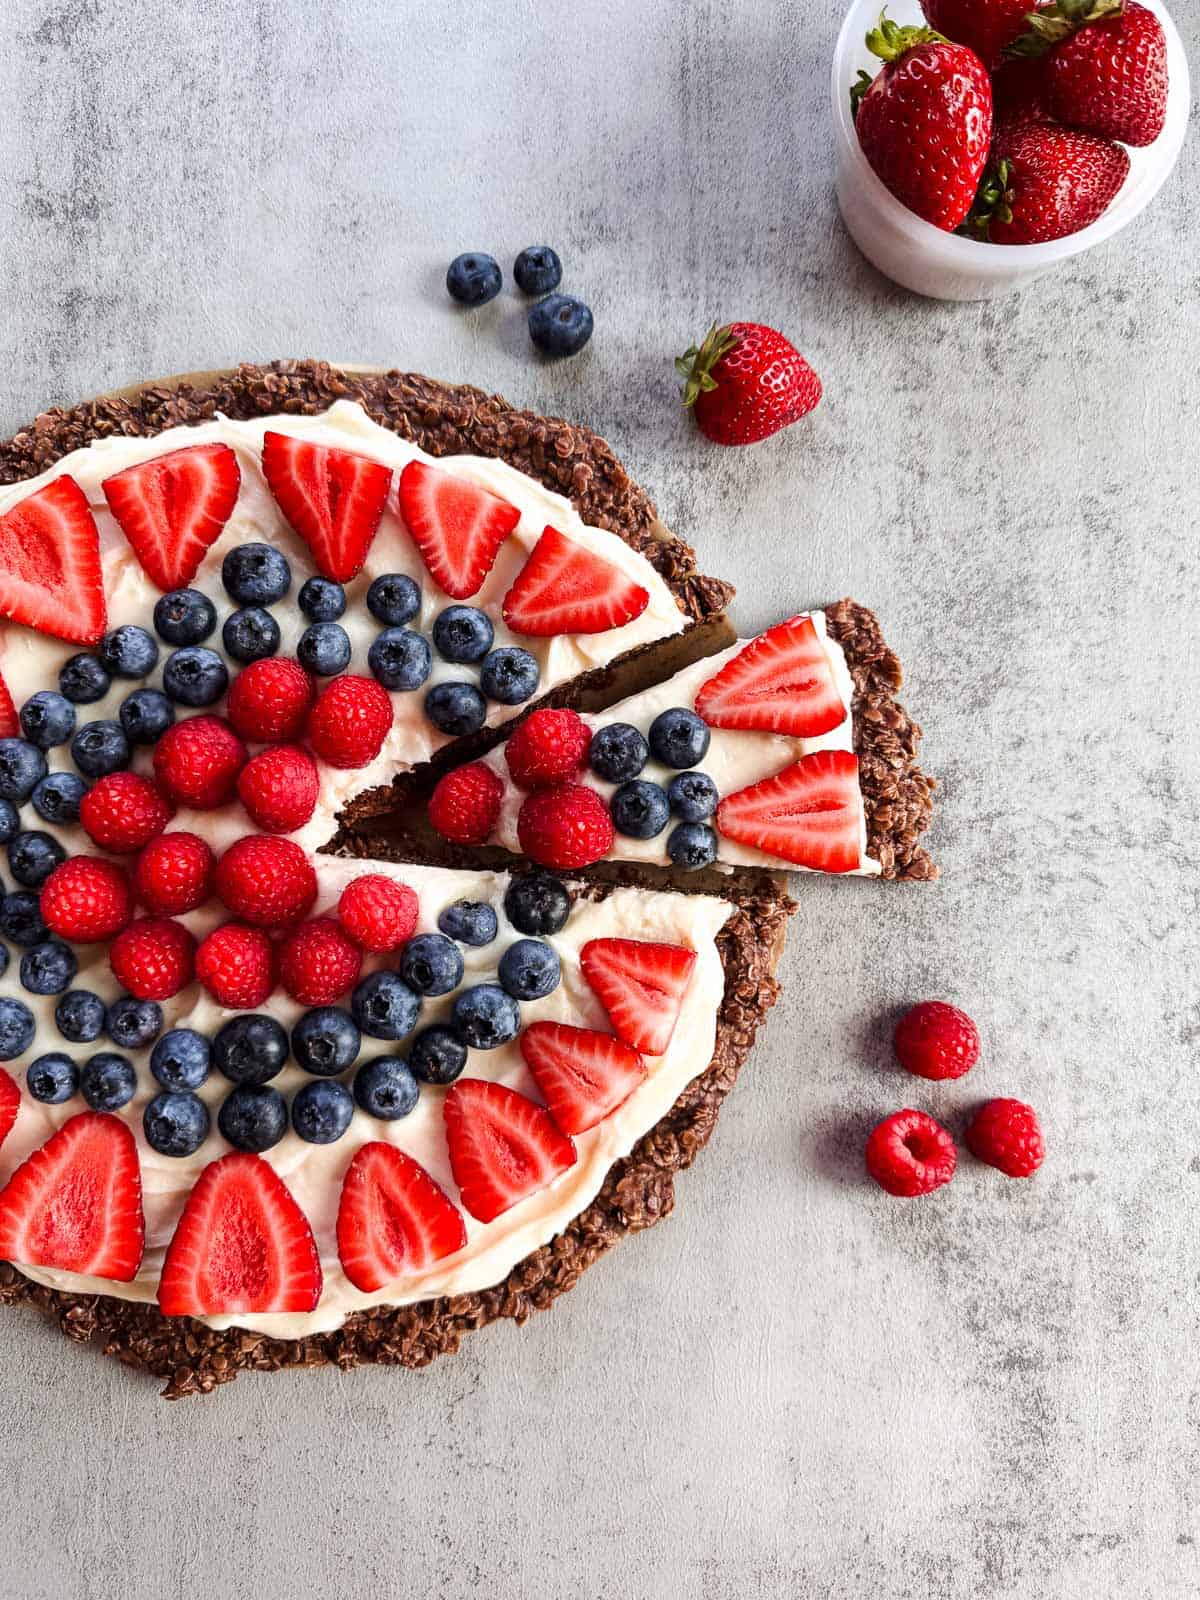
The cream cheese frosting is the kind that holds up without turning into a puddle, which matters more than you'd think when you're hauling this to a summer cookout or leaving it on the counter while your kids circle it like sharks.
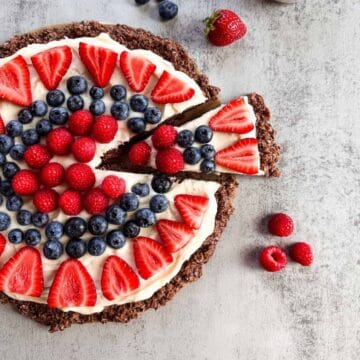
I kept the fruit simple: strawberries, blueberries, and raspberries, all low FODMAP at the right serving sizes. If you want to get fancy with the arrangement, go for it. If you want to dump the berries on and call it rustic, also valid.
If fresh strawberries are your thing right now, my crustless strawberry pie is another easy summer dessert worth keeping in your back pocket.
Reader Love
"My husband usually gives away the dessert once we have guests over but he didn't want to do that with this one!! So easy to make!!"
- Jo
⭐⭐⭐⭐⭐
Jump to:
- Reader Love
- Why You'll Love This Recipe
- What You'll Need
- What Equipment You'll Need
- Step-By-Step Instructions
- Tips and Tricks
- Making Fruit Pizza in Advance
- Ingredient Swaps
- Fruit Pizza Variations and Fun Ideas
- Fourth of July Fruit Pizza Flag
- Special Diet Variations
- Gluten Free Notes
- Storing
- FAQs
- Low FODMAP Notes
- How To Serve Gluten Free Fruit Pizza
- More Loveable Dessert Recipes
- Love This Recipe?
- Recipe
Why You'll Love This Recipe
- No oven needed - a huge win on a hot summer day
- The chocolate oat crust is something special - it doubles as a no bake cookie in disguise
- Gluten free and easily modified to be dairy free or low FODMAP
- Looks stunning on a table with very little effort
- A great make-ahead dessert for cookouts, potlucks, or a lazy weekend
What You'll Need

Crust:
- Butter - Softened butter helps the crust hold together and gives it that rich, fudgy texture.
- Granulated Sugar - Sweetens the crust and helps it set up properly. Do not reduce it.
- Milk - Regular milk or unsweetened almond milk both work great here.
- Unsweetened Cocoa Powder - Regular or Dutch processed cocoa both work. Dutch processed will give you a deeper, richer chocolate flavor.
- Quick Cooking Oats - These are the base of the crust. If you only have old-fashioned oats, pulse them a few times in a food processor first. Also, if you are making this for someone with celiac disease or a wheat allergy, be sure to use certified gluten free oats.
Cream Cheese Frosting:
- Cream Cheese - Use brick cream cheese, not the spreadable kind in a tub. It needs to be fully softened so there are no lumps in the frosting.
- Butter - Also softened. It blends into the cream cheese and makes the frosting smooth and creamy.
- Powdered Sugar - Sweetens and thickens the frosting layer.
- Pure Vanilla Extract - Adds a bit of warmth and rounds out the flavor.
Toppings:
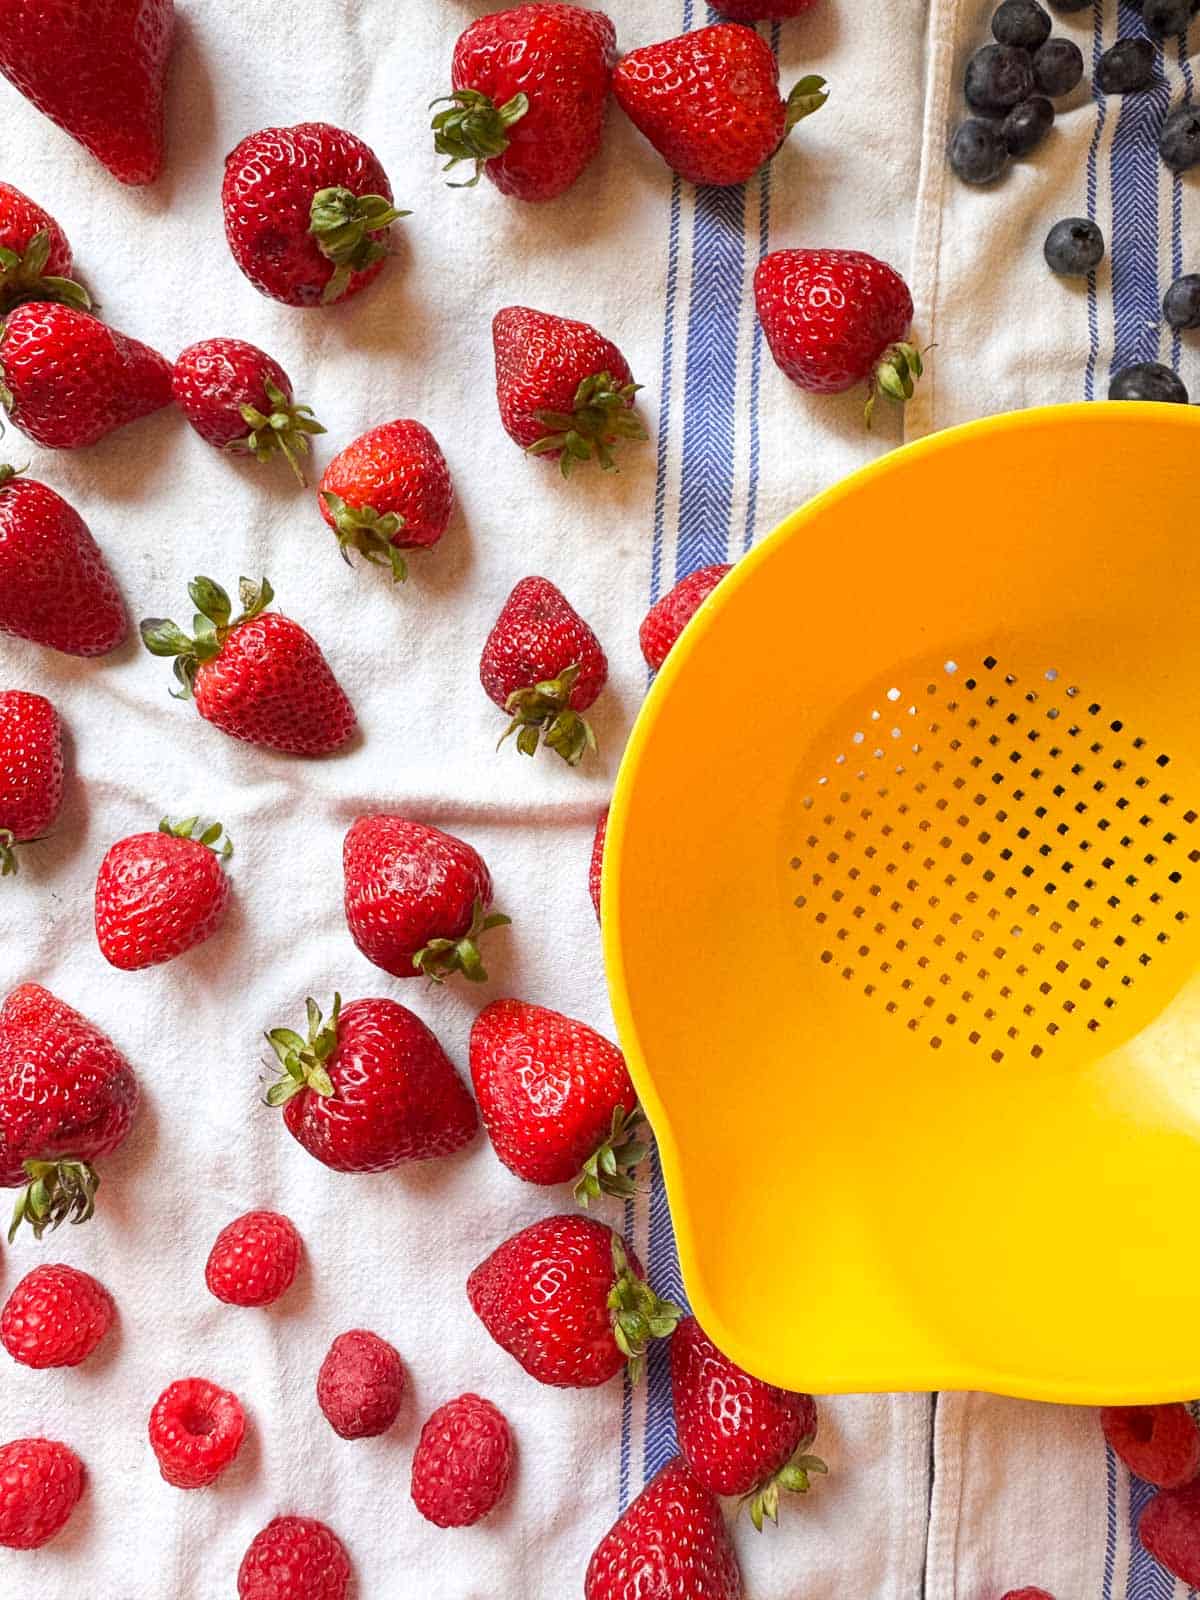
- Fresh Berries - Strawberries, blueberries, and raspberries are a classic combo. Wash and dry them well before adding them to the pizza so they do not bleed into the frosting.
See the recipe card for the exact measurements and complete instructions.
What Equipment You'll Need
Pizza Pan: 12-inch was the perfect size. It is ok to use a pizza crisper pan, with the little holes in it. Just make sure you top it with parchment paper or wax paper so nothing falls through.
Parchment Paper: For a no mess, non-sticking fruit pizza. I trace and cut the paper to the size of the pan.
Electric Mixer or Standing Mixer: While you could beat the softened cream cheese by hand, it is a million times easier to use either an electric mixer or a stand mixer to get a smooth and creamy cream cheese frosting.
Offset Spatula: Ok this one isn't technically needed, I love to use my small one to make pretty swirls in the cream cheese layer. A knife or a scraper will work too.
Step-By-Step Instructions

Step 1: Start the crust base
Add butter, granulated sugar, and milk to a large saucepan. Heat over medium until the butter melts and the sugar dissolves, then bring to a gentle boil. Once you see steady bubbles, set a timer for 1 minute and stir the whole time.
This keeps the bottom from burning and makes sure your crust sets up firm instead of crumbly.
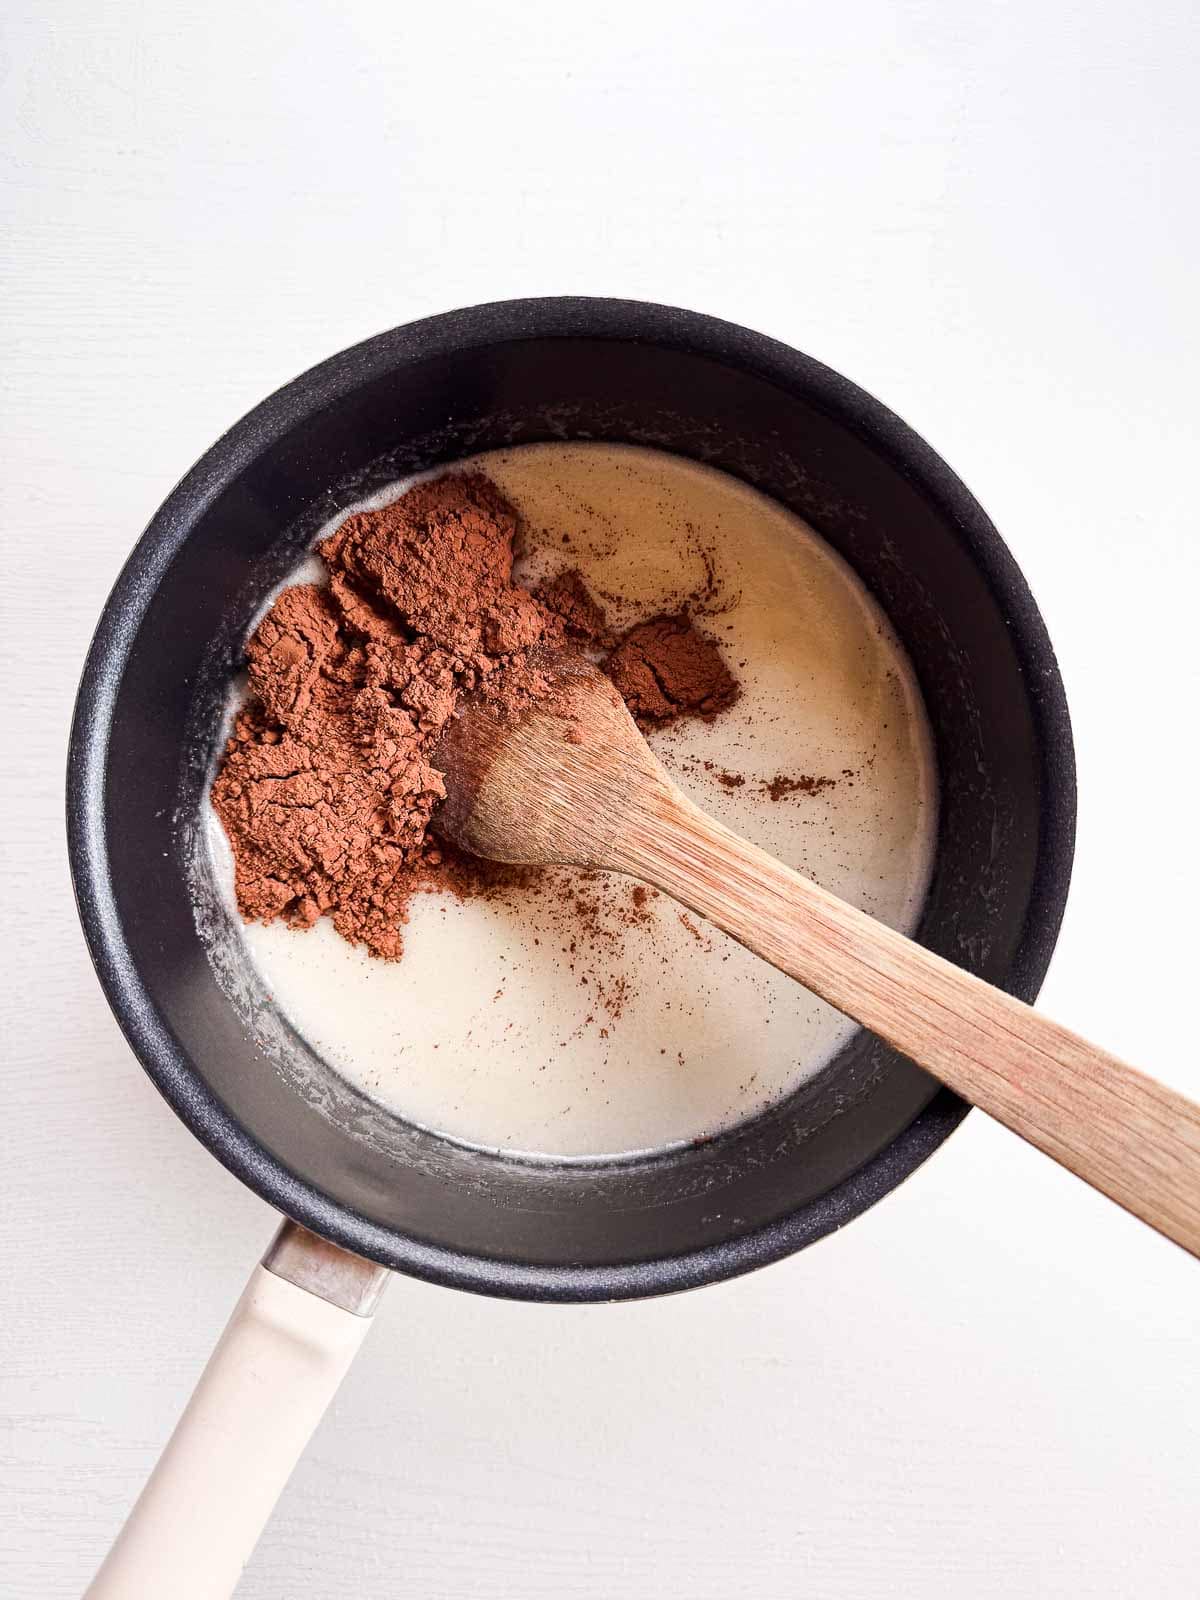
Step 2: Add cocoa powder for rich flavor
Stir in the cocoa powder while the mixture is still hot so it "blooms" and deepens the chocolate flavor. It may look wrong at first (don't panic, it's normal). The oats will help pull it together.
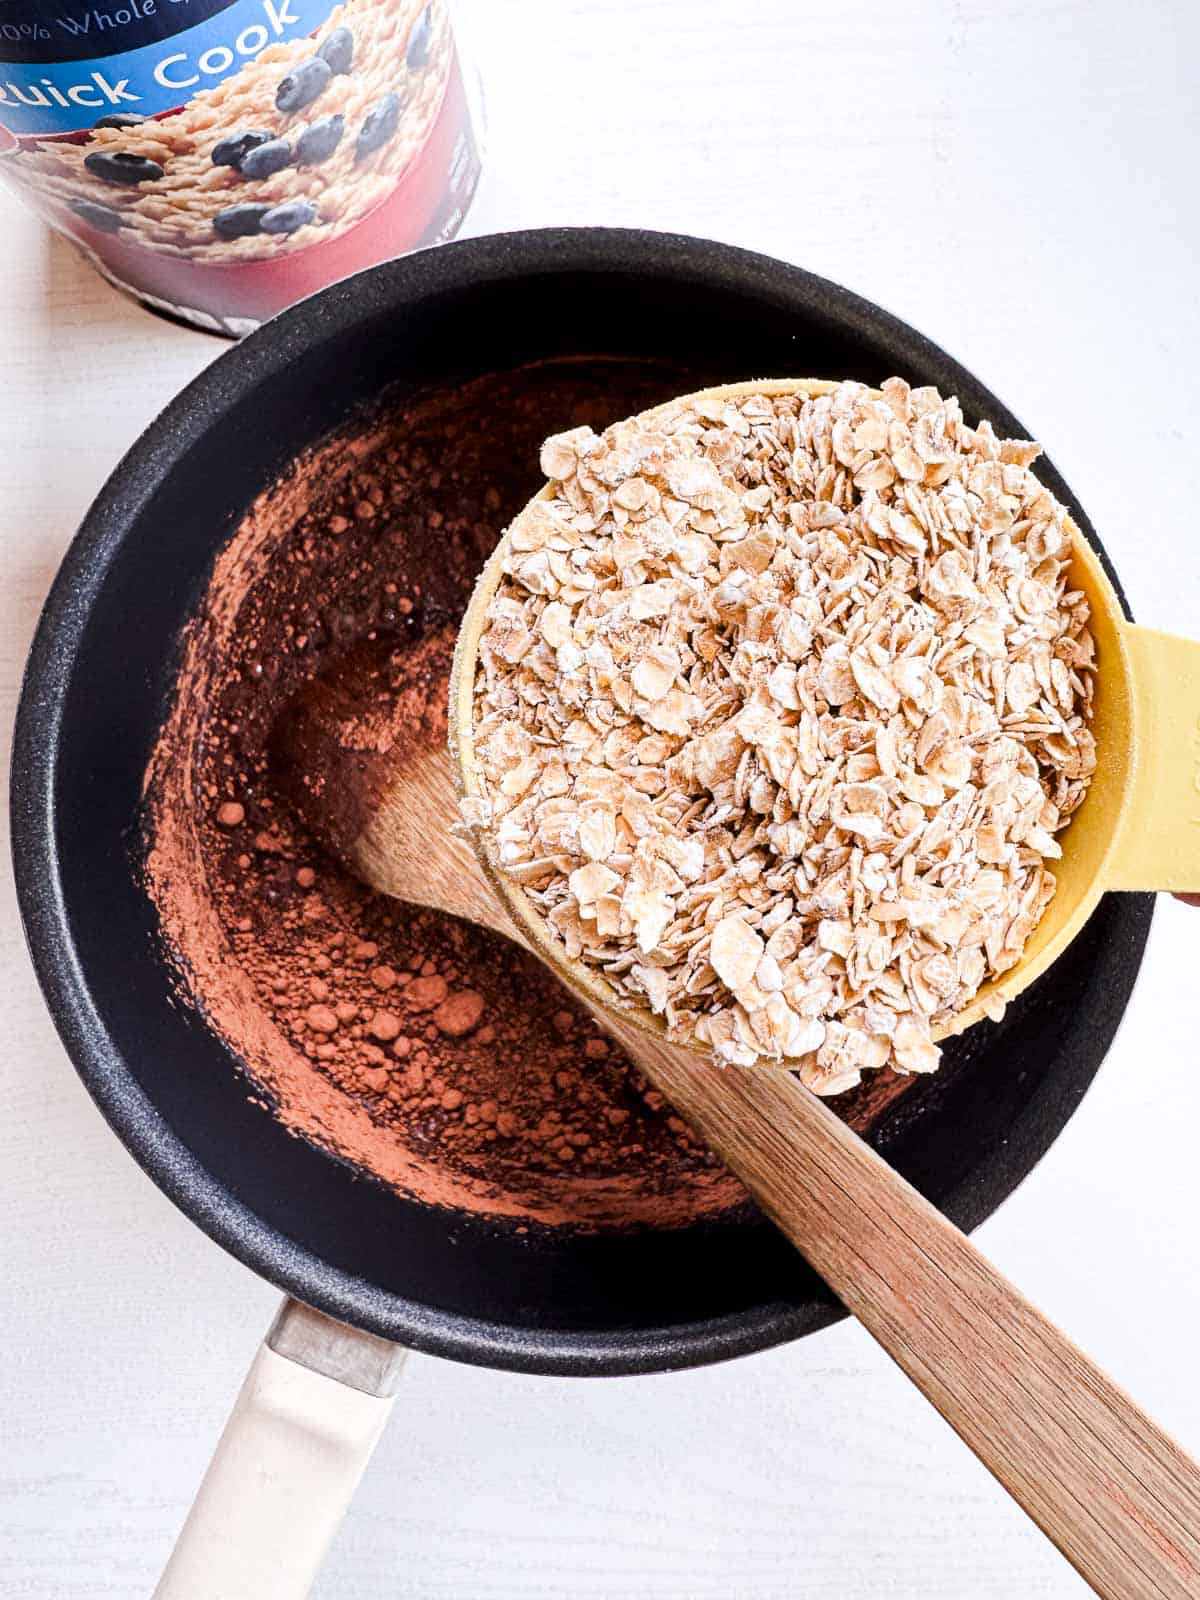
Step 3: Stir in oats for the crust
Add quick oats and stir until every flake looks coated and glossy. This step is your crust's backbone.
If the oats aren't fully coated, you'll end up with loose crumbs instead of neat slices. If using old-fashioned oats, pulse them first in a food processor so you don't end up with a jaw workout.
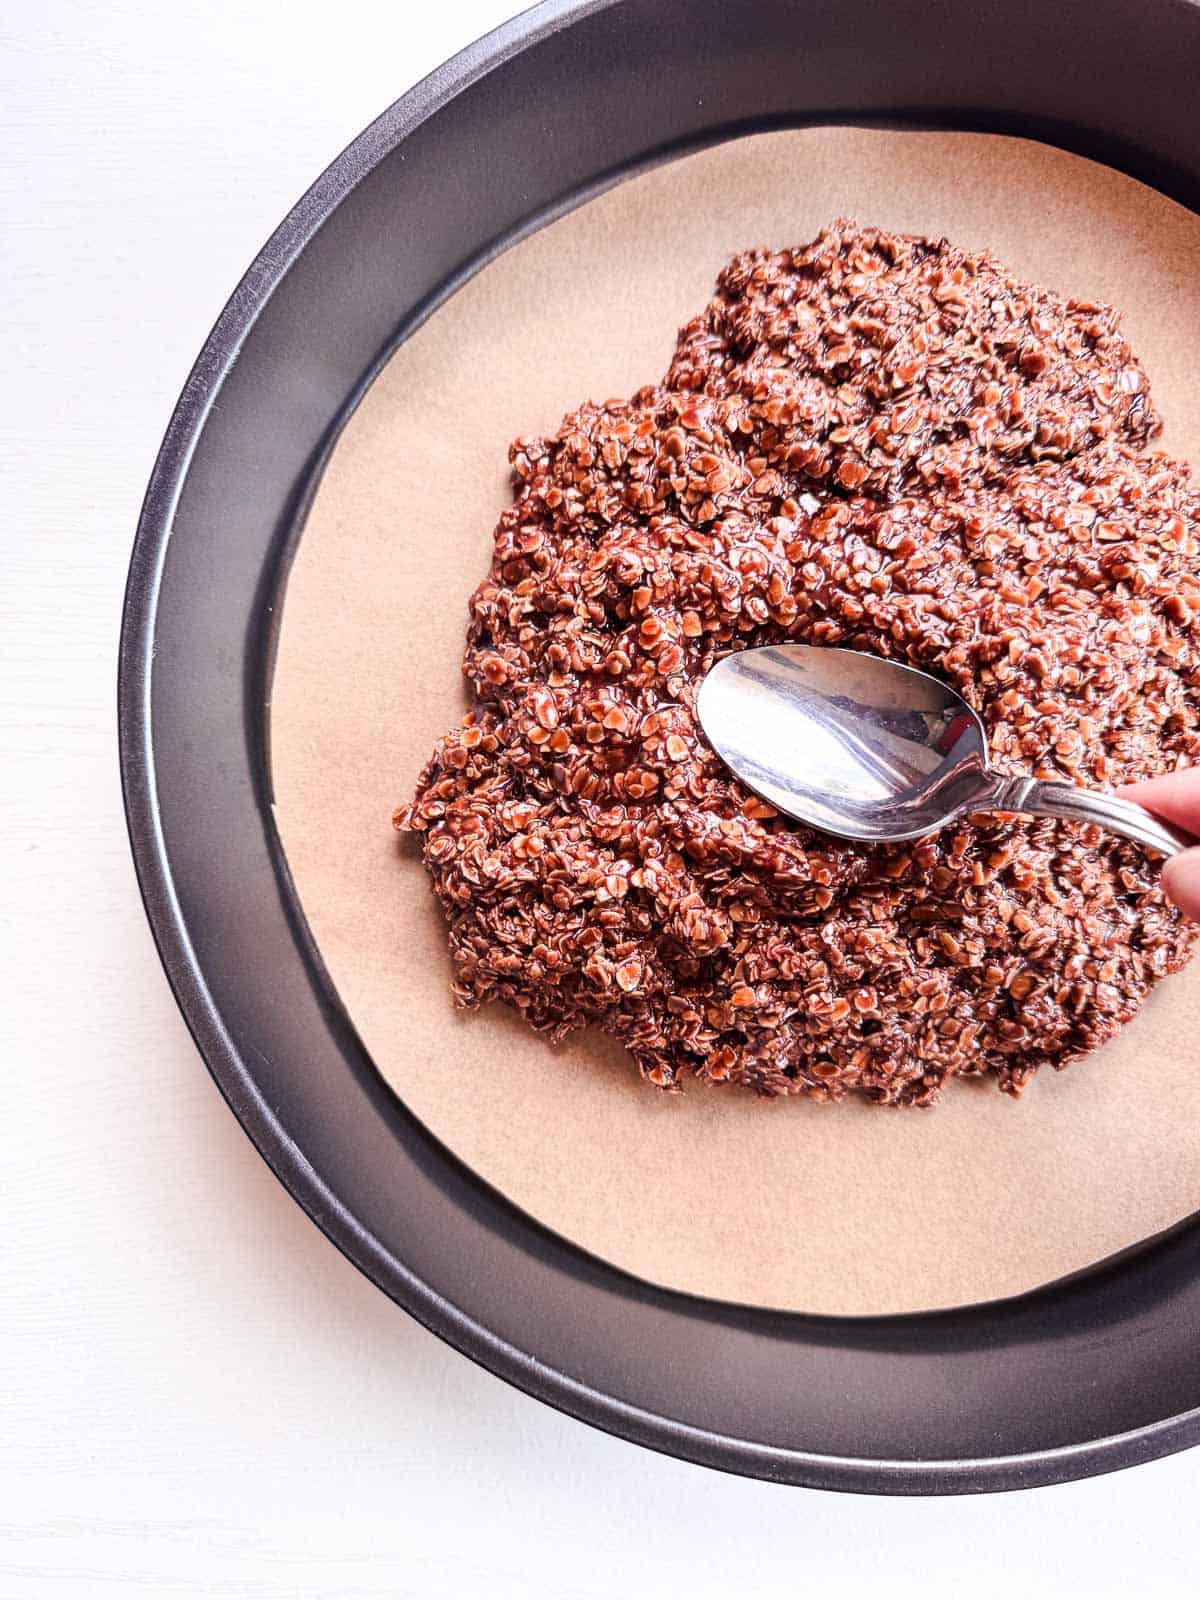
Step 4: Press and chill the crust
Line your pizza pan with parchment or wax paper so you can lift it out later without any sticking drama.
Spread the chocolate oat mixture evenly and press it down firmly with the back of a spoon (or the bottom of a measuring cup) to create a sturdy crust. Pressing hard now = no crumbling later.
Chill until set. If you're in a hurry, the fridge will do it in about 30 minutes; the countertop works if you're more patient and don't have room in the refrigerator.
It is ready once it is firm to the touch, not sticky and not warm.

Step 5: Make the "sauce" layer
Once the crust is completely cool (this is a must or your sauce will melt into a chocolatey slip-and-slide), beat softened cream cheese and butter together until smooth and lump-free.
This creamy layer balances the rich crust and sweet fruit, and it's the glue that keeps everything in place.

Step 6: Add sweetness and flavor
Beat in powdered sugar and vanilla until light and fluffy.
Powdered sugar sweetens, thickens, and makes the sauce easier to spread without tearing the crust. If it feels too thick, add a splash of milk to loosen it.

Step 7: Spread the sauce on the crust
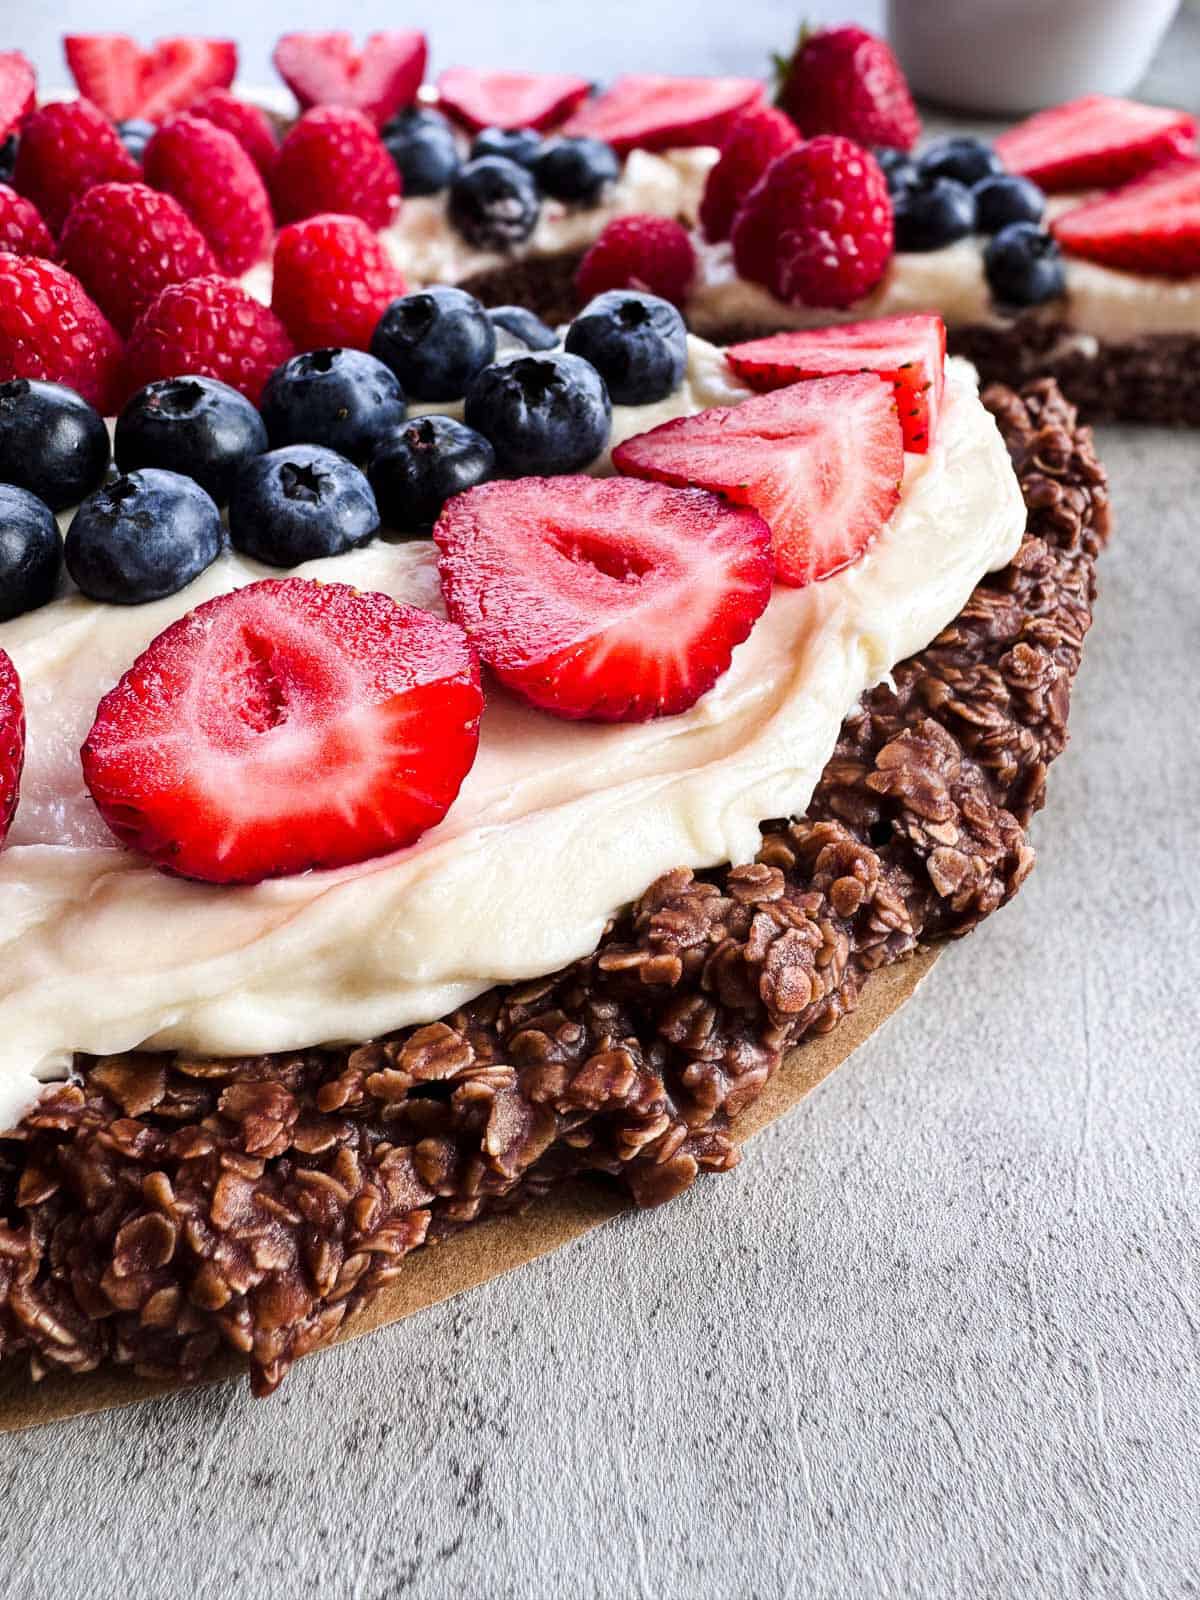
Dollop the cream cheese mixture over the cooled no bake oatmeal crust, then gently spread into an even layer using an offset spatula.
Work slowly. Why, if you press too hard, you'll pull up bits of crust. Leaving a small border around the edge keeps things tidy.

Step 8: Prep the fruit toppings
Wash fruit and pat completely dry (water = runny sauce). Cut fruit into bite-sized pieces so no one needs a knife at the table.
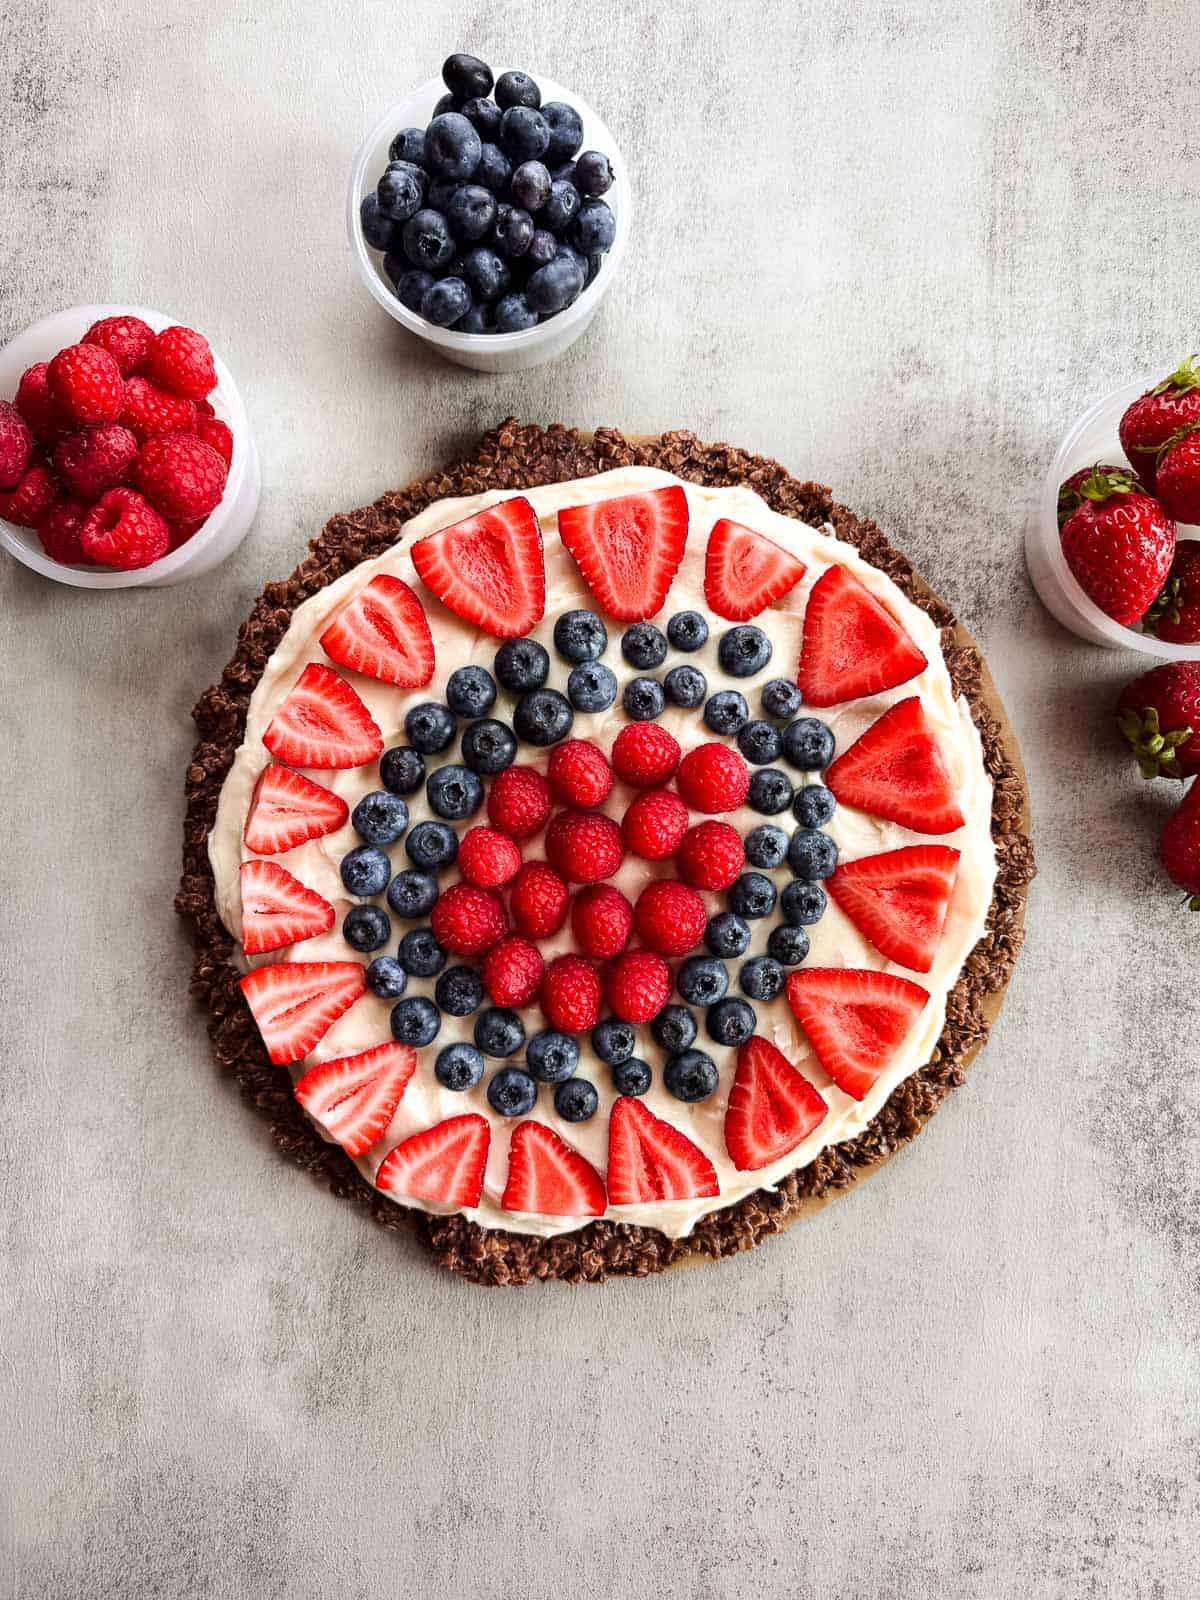
Stick to low FODMAP portions like blueberries, raspberries, and a few strawberries. If you're feeling artsy, arrange them in circles, stripes, or even a flag pattern for the Fourth of July.
Tips and Tricks
Don't boil the butter, sugar, and milk for more than 1 minute.
This is the step I got wrong the first few times. Extra boiling time pulls moisture out of the mixture and gives you a crumbly crust that falls apart when you try to slice it. Don't forget to stir the entire time too!
Pick your pan, pick your crust style.
A small pizza pan makes a thicker, chewier crust, while a larger pan gives you a thinner, crisper base. My favorite was our 12-inch pizza pan.
Don't skip the crust chilling time.
Unless you want a melty cream cheese mess, make sure the fruit pizza crust is cold. Trust me, you don't want to try to push this one. It works great to make the no bake fruit crust the day before if you are worried about timing.
Room temperature is your friend. Cold cream cheese = stubborn little lumps that refuse to blend. Soften it first for a silky-smooth sauce.
Pat your fruit completely dry.
Water + cream cheese = sad, runny sauce. A quick pat-down with a paper towel keeps everything picture-perfect.
Want a finishing touch (it includes more chocolate)?
A drizzle of melted chocolate right before serving looks great and take about two minutes.
Making Fruit Pizza in Advance
Here is what works for me! I make the no-bake crust and the cream cheese frosting the day before. I keep the crust covered and store in the refrigerator. The cream cheese frosting goes into an airtight container in the refrigerator with a note… do not eat. Seriously, otherwise it would be gonnneee.
When I am ready to serve, I pull the crust and frosting out of the refrigerator and spread the frosting out with an offset spatula. Then I prep the fruit. Wash, cut if needed and pat dry with a paper towel. Arrange it in a beautiful pattern!
If I am taking it to a potluck or a BBQ I will make it in a 9x13-inch baking dish. It has a cover and I have a convenient insulated portable container that I can put in an ice pack. No worries about warm cream cheese frosting and mushy fruit. Nobody seems to care that it isn't in a pizza pan. I slice into squares and everyone is thrilled!
Ingredient Swaps
- Milk - Unsweetened almond milk works perfectly as a one-to-one swap.
- Cocoa Powder - Regular or Dutch processed both work. Dutch processed cocoa gives the crust a richer, darker flavor.
- Oats - Old-fashioned oats can be used if you pulse them in a food processor first. This helps break them down so the crust is not too chewy.
Fruit Pizza Variations and Fun Ideas
Make Mini Fruit Pizzas: Divide the crust mixture into cookie-sized rounds and build individual fruit pizzas. Great for parties where everyone wants to pick their own toppings.
Kids Decorating Activity: Prep the fruit and let the kids go to town decorating the pizza. It keeps them busy, and they are way more likely to eat something they built themselves. This is great for birthday parties instead of serving cupcakes!
Candy Pizza: Not in the mood for fresh fruit? Go full dessert mode with chopped gluten free candy like Reese's Peanut Butter Cups, Heath Bars, or M&Ms on top. It is also the perfect way to clear out the leftover Halloween stash. Nobody is complaining about that.
Fourth of July Fruit Pizza Flag
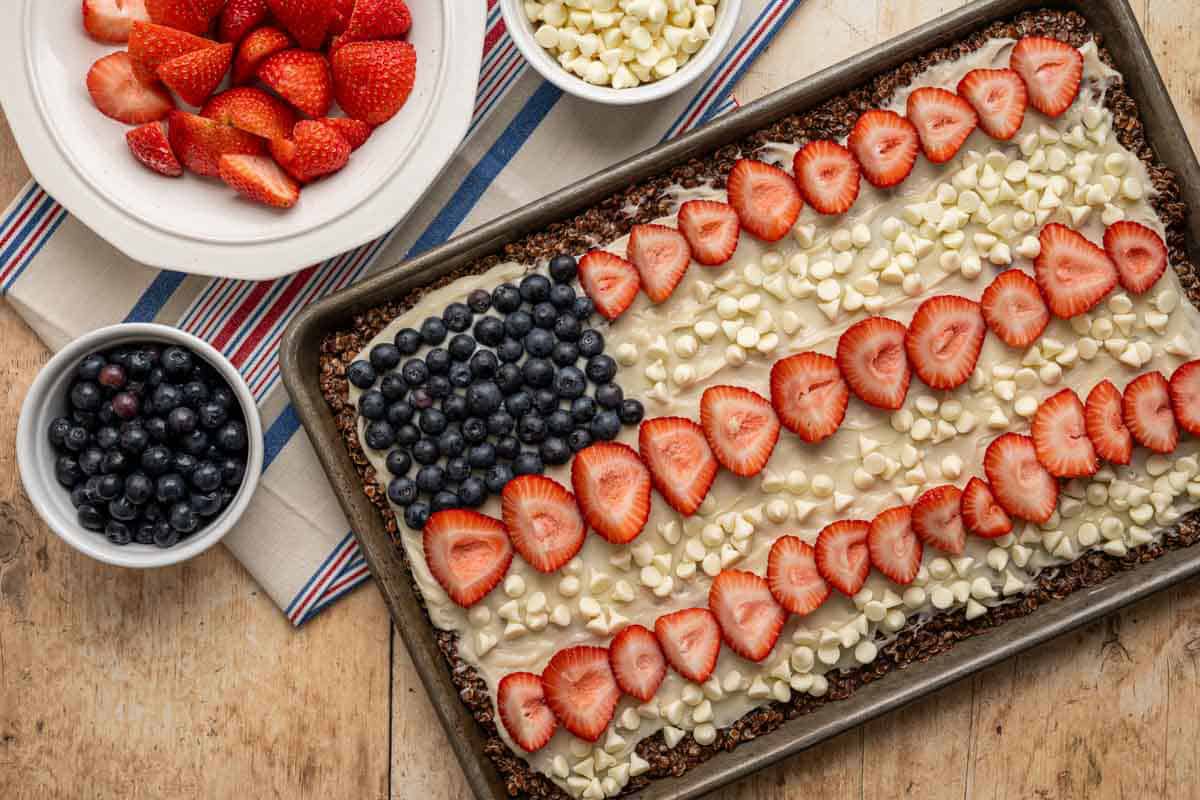
This no bake chocolate fruit pizza is one of the easiest ways to make a festive Fourth of July dessert without turning on the oven in the middle of summer. Nobody wants to bake in July. Minnesota summers are short and precious, and the oven is not invited.
To make it into a flag, swap your round pizza pan for a sheet pan or a rectangular baking dish. Press the crust out into an even rectangle, let it set, and add the cream cheese frosting layer. Then use your fruit to create the flag design:
- Stars section: Add blueberries to the upper left corner in rows to create the star field.
- Stripes: Alternate rows of sliced strawberries and white chocolate chips (or leave rows of plain frosting as the white stripes) across the rest of the pizza.
A few tips for flag success:
- Use a toothpick or the back of a spoon to nudge berries into place. This is a great job for kids and teens who want to help.
- A glass 9x13-inch baking dish makes transport way easier if you are heading to a cookout or a neighborhood gathering.
- Add the fruit right before you leave the house so the frosting stays clean and the berries look fresh.
This is one of those desserts where people immediately say something when they see it on the table. Worth it. The Brownie Ice Cream Cake is another great option with red, white, and blue sprinkles if you want to round out your Fourth of July dessert spread.
Special Diet Variations
Dairy-Free Fruit Pizza: Swap in plant-based butter and dairy-free cream cheese for a totally dairy-free treat that's still creamy, rich, and just as irresistible.
Low FODMAP Fruit Pizza: To keep this low FODMAP, choose low FODMAP fruits for the topping. Blueberries and raspberries are great options. Strawberries are low FODMAP at a small serving, so use them as an accent rather than the main topping. For the frosting, use a lactose free cream cheese option if needed.
Different Fruit Combos: Summer berries are classic, but sliced kiwi, mandarin oranges, and fresh pineapple will all look beautiful and work well. The Dairy Free Strawberry Sorbet uses a lot of the same fresh fruit energy if you want a related summer dessert in your back pocket.
Gluten Free Notes
This recipe is naturally gluten free as long as you use certified gluten free oats. This is especially important if someone at your table has celiac disease or a wheat allergy. Regular oats are often processed in facilities that also handle wheat, so the certified label matters in case of cross contamination.
Looking for more gluten free recipes to bring to your next gathering? There are plenty of options that work for the whole table.
Storing
Store: Keep the assembled fruit pizza covered in the refrigerator for up to 2 days. Add fresh fruit right before serving if you are making it ahead and want the toppings to look their brightest.
Freeze: Freezing is not recommended once the fruit is on top. The fruit will release moisture when it thaws and make the frosting watery. You can freeze just the crust, tightly wrapped, for up to one month. Thaw in the refrigerator and then add the frosting and fruit.
FAQs
Yes! If you only have old-fashioned oats, pulse them in a food processor a few times to break them down. This keeps the crust from being too thick and chewy. Use certified gluten free oats if needed.
You can let it set at room temperature if you have time, but the refrigerator speeds it up significantly. Either way, it needs to be fully cooled and firm before you add the frosting.
Yes! You can make the crust and frosting layer the day before and keep it separate and covered in the refrigerator. Add the frosting and fresh fruit right before serving so the toppings stay fresh.
Fresh fruit is the way to go here. Frozen fruit releases a lot of moisture when it thaws, which will make the frosting wet and the presentation messy. Stick with fresh for the best result.
For a dairy-free or lighter option, try coconut yogurt or whipped canned coconut cream. Just note that these are softer and may not hold fruit as firmly as cream cheese.
The cream cheese or butter was too cold when you started mixing. Both need to be fully softened at room temperature before beating. If you end up with lumps, keep beating - sometimes they smooth out with a little extra time.
Once assembled, it's best eaten within 4-6 hours. Leftovers can be stored in an airtight container in the fridge for up to 2 days, but the crust will soften over time.
A small pizza pan will give you a thicker crust, and a larger pizza pan will give you a thinner one. A standard 12-inch pizza pan or a round 9-inch cake pan both work well. For the Fourth of July flag version, use a 9x13-inch glass baking dish. Just make sure whatever pan you use is lined with parchment paper or wax paper.
It can be! Use lactose free milk, lactose free cream cheese, and stick to low FODMAP fruits like blueberries and raspberries. See the Low FODMAP Notes section above for serving size details.
Low FODMAP Notes
Low FODMAP ingredient guidance is based on the Monash University Food App and FODMAP Friendly App testing results as of the day posted. As always, modify based on your gut and what works for you on a low FODMAP diet.
- Oats - ¼ cup dry (23 grams) per meal is low FODMAP per Monash.
- Cream Cheese - 2 tablespoons (40 grams) per meal. Use lactose-free cream cheese.
- Blueberries - 1 cup (125 grams) per meal is low FODMAP.
- Strawberries - 5 medium (65 grams) per meal are low FODMAP.
- Raspberries - ⅓ cup (58 grams) per meal are low FODMAP.
How To Serve Gluten Free Fruit Pizza
Slice it like a pizza and serve it chilled. This fruit pizza with cream cheese frosting is rich enough to stand on its own, but a small scoop of vanilla ice cream or a dollop of low FODMAP whipped cream on the side takes it over the top. This is also a fun dessert for kids to help decorate - hand them the berries and let them go.

More Loveable Dessert Recipes
Love This Recipe?
Leave a ⭐⭐⭐⭐⭐ rating + comment. It helps so much, and we love hearing from everyone! Thank You -Venessa
Recipe
Gluten Free Fruit Pizza
Equipment
- Electric Mixer or Stand Mixer
- Offset Spatula 9-inch
Ingredients
No Bake Crust:
- ½ cup butter softened
- 2 cups white granulated sugar
- ½ cup milk (Note 1)
- ½ cup unsweetened cocoa powder (Note 2)
- 3 cups quick cooking oats (Note 3)
Cream Cheese Frosting:
- 8 ounces brick cream cheese softened
- 3 tablespoons butter softened
- 1 and ¼ cups powdered sugar
- 1 teaspoon pure vanilla extract
Fruit Pizza Toppings:
- 3 cups assorted strawberries, blueberries, and raspberries (Note 4)
Instructions
How To Make The No Bake Crust:
- In a saucepan big enough to hold all the ingredients, add the butter, granulated sugar, and milk. Heat over medium heat until the mixture starts to boil. Boil for 1 minute, stirring constantly. After the minute is done, remove from the heat.
- To the saucepan, add the cocoa powder. Stir. The cocoa powder will not mix easily into the butter sugar mixture. Once it is somewhat incorporated, add the oats. Stir until all the oats and cocoa powder are combined. Set aside.
- Cut a piece of parchment paper to line whatever pan you are using. A small pizza pan will give the fruit pizza a thicker crust; likewise, a large pizza pan will result in a thin crust. No matter what pan you use, it needs to be lined with either parchment paper or wax paper.
- Evenly spread the oatmeal mixture in the pan to create an even pizza crust. Using a spoon, pack the crust into an even, flat layer. Let the crust set up in the refrigerator or on the countertop if you are not in a hurry.
How To Make The Cream Cheese Frosting:
- Once the fruit pizza crust has cooled completely, it is time to make the sauce. Otherwise, the sauce will melt and turn into a mess. Good things are worth the wait.
- In a stand-up mixer bowl or a large mixing bowl with a hand mixer, beat the softened cream cheese and softened butter until combined. No lumps should remain.
- Next, add the powdered sugar and vanilla extract. Beat again until everything is combined.
- Using an offset spatula, spread the sauce evenly over the cooled pizza crust.
Fruit Pizza Toppings:
- Wash and dry any fruit to be used as a topping. Otherwise, the fruit may bleed and add extra moisture to the sauce.
- Cut, chop, or leave whole any pieces of fruit you want to use to decorate your fruit pizza. Use my example or create your own!

Venessa Mandelkow says
Love this spin on fruit pizza with a no bake crust! The combination of the fresh berries with the chocolate oatmeal crust is so good!
jo says
My husband usually gives away the dessert once we have guests over but he didn't want to do that with this one!! So easy to make!!
Venessa Mandelkow says
Hi Jo! I love this story! Thanks for sharing. Sounds like you better make another fruit pizza - Venessa