
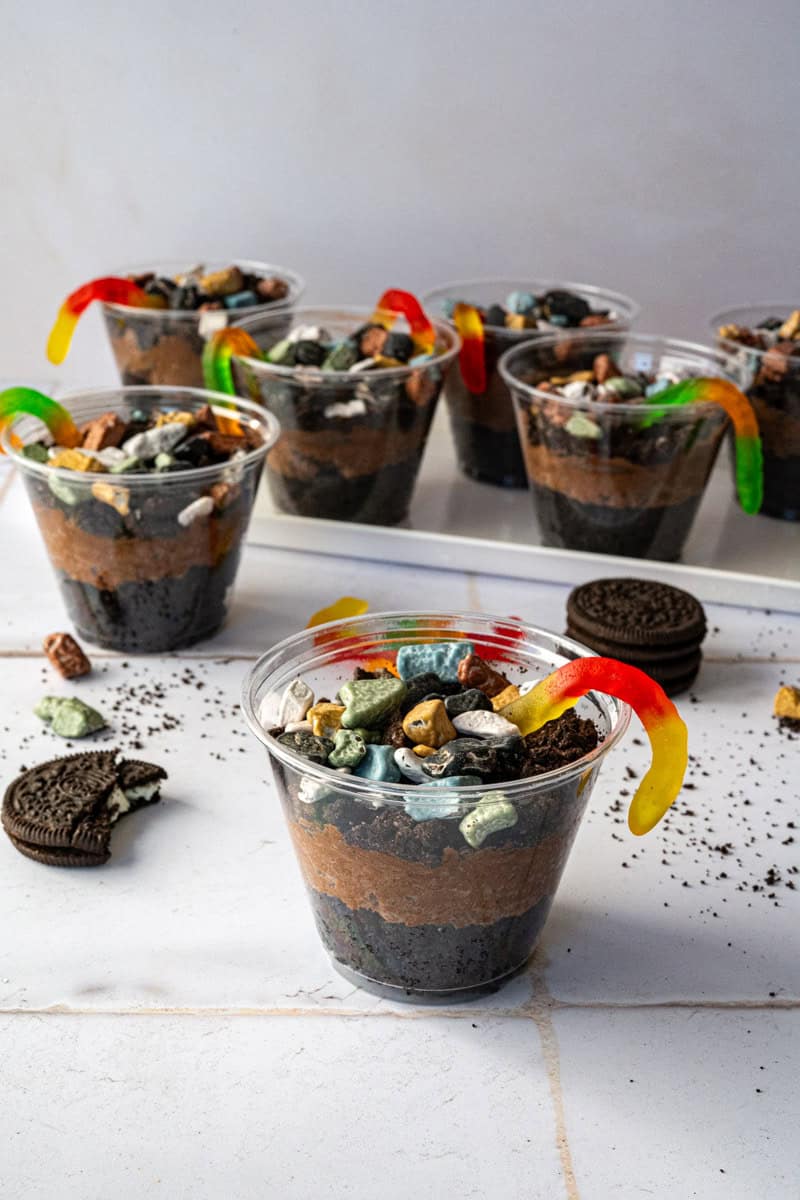
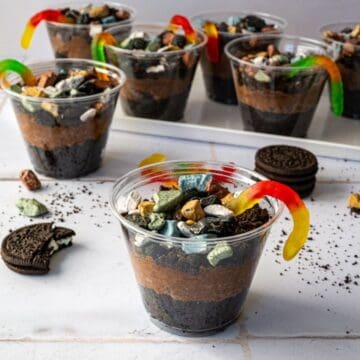
Some desserts are classic for a reason, and dirt cake cups are one of them. These start with a fudgy brownie base, then get layered with a rich chocolate pudding made with heavy cream, not Cool Whip. Crushed Oreos and gummy worms finish things off for that familiar dirt cake feel. Every bite delivers layers of chocolate in the best way.

Easy dessert recipes that work for parties are always my go-to, especially dirt dessert cups served in individual portions. That's why no bake fruit pizza and Nutella puppy chow are regulars around here. They are simple, familiar favorites that fit right in at potlucks, birthdays, and casual get-togethers, just like these dirt cake cups.
Jump to:
Why You'll Love This Recipe
- Individual servings make these dirt cake cups easy to serve, transport, and share at parties.
- A fudgy brownie base and chocolate mousse deliver rich, classic chocolate flavor.
- Simple ingredients with easy swaps make this recipe gluten free friendly.
What You'll Need
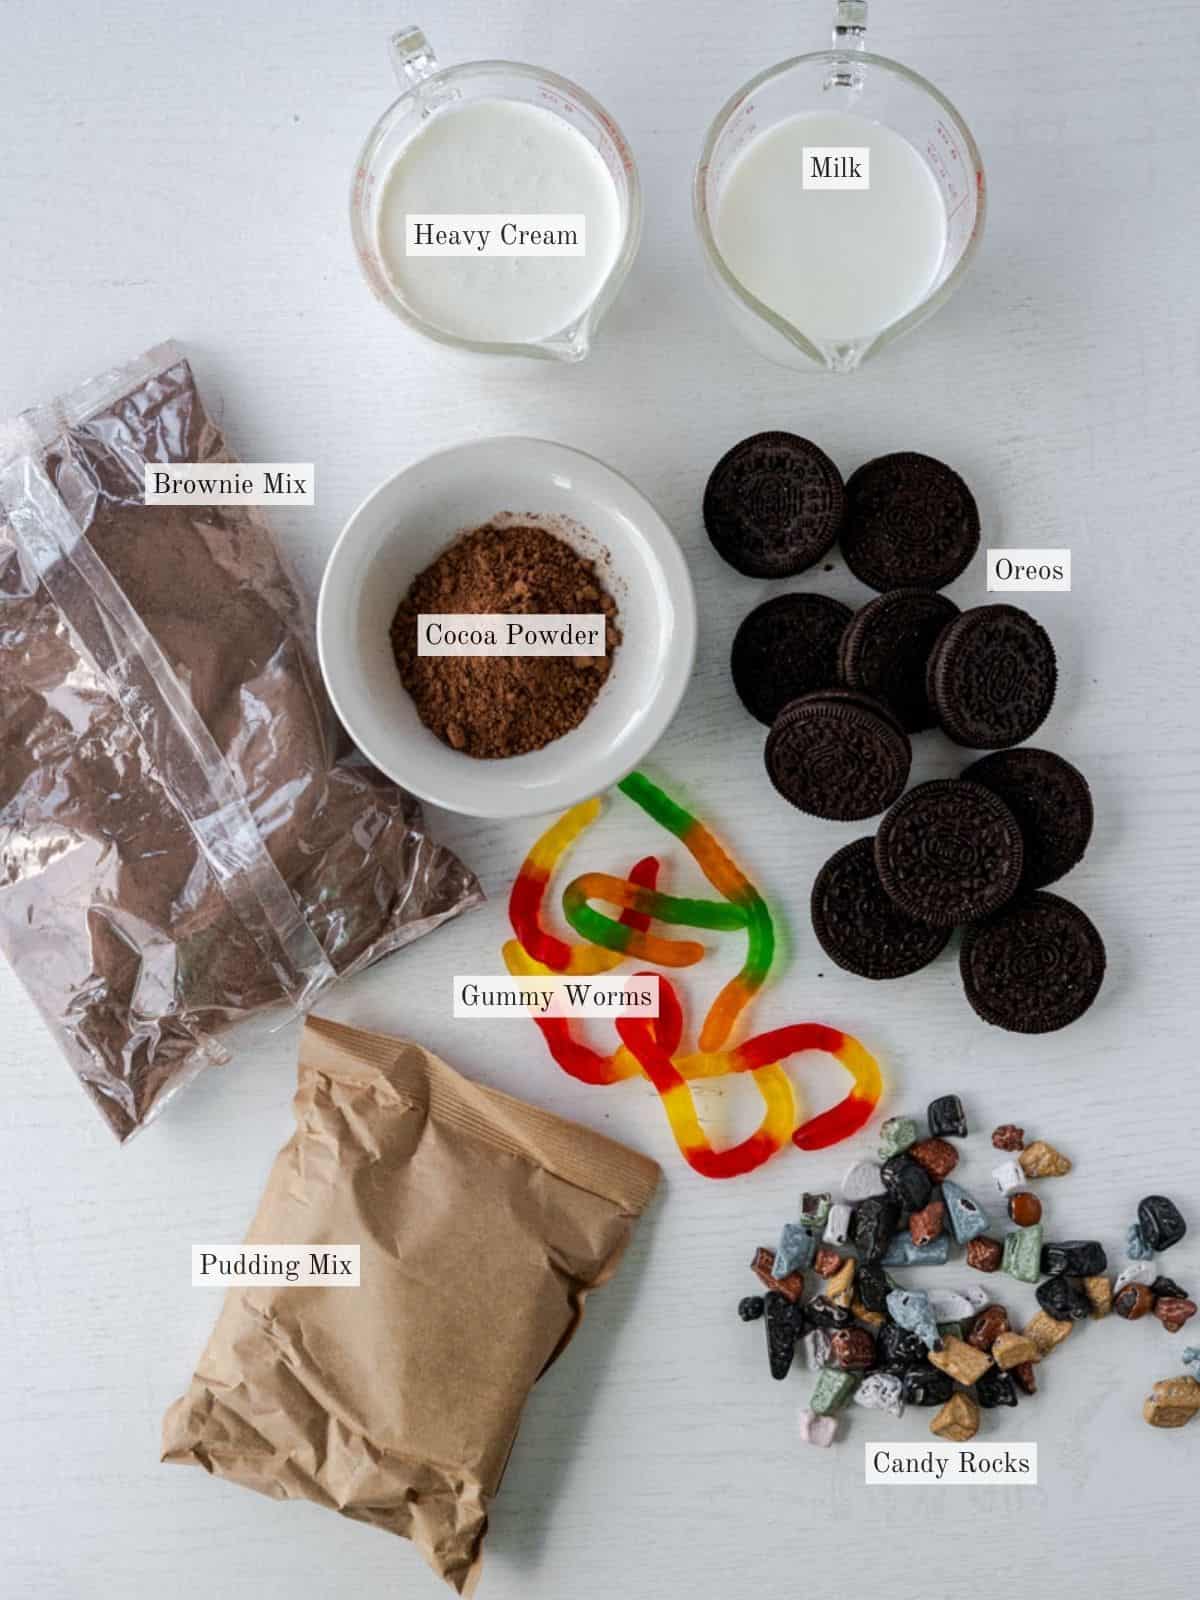
- Brownie Layer
- Brownie mix + ingredients to prepare brownies - Creates a fudgy base that adds structure and makes these dirt cake cups richer than versions made with cookies alone.
- Pudding Layer
- Instant chocolate pudding mix - Forms the base of the chocolate pudding layer.
- Unsweetened cocoa powder - Boosts chocolate flavor without extra sweetness.
- Heavy whipping cream - Whipped into the pudding for a thick mousse instead of whipped topping.
- Milk - Loosens the pudding just enough for easy layering.
- Dirt Layer
- Oreos - Crushed for the classic dirt look and crunch.
- Gummy worms - Add the familiar, playful touch.
- Candy rocks - Finish the cups with extra texture and visual interest.
See the recipe card for the exact measurements and complete instructions.
Step-By-Step Instructions
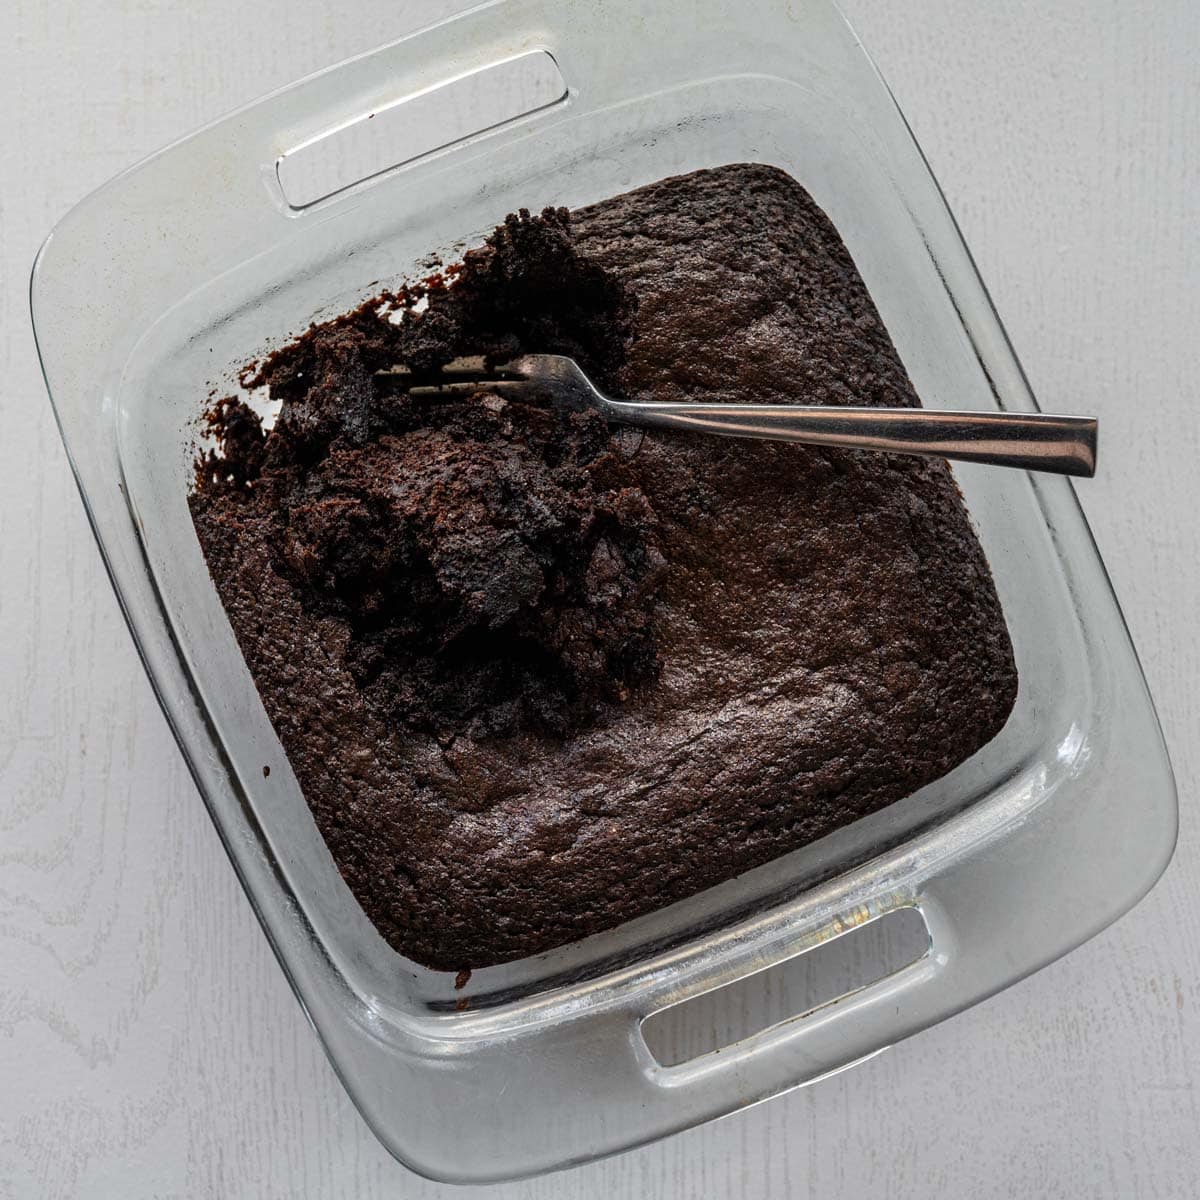
Step 1: Bake the brownies - Prepare the brownies according to the package instructions. Let them cool for about 15 minutes, then use a fork to rake them into crumbs. Spread the crumbs on a baking sheet and refrigerate until completely cool.
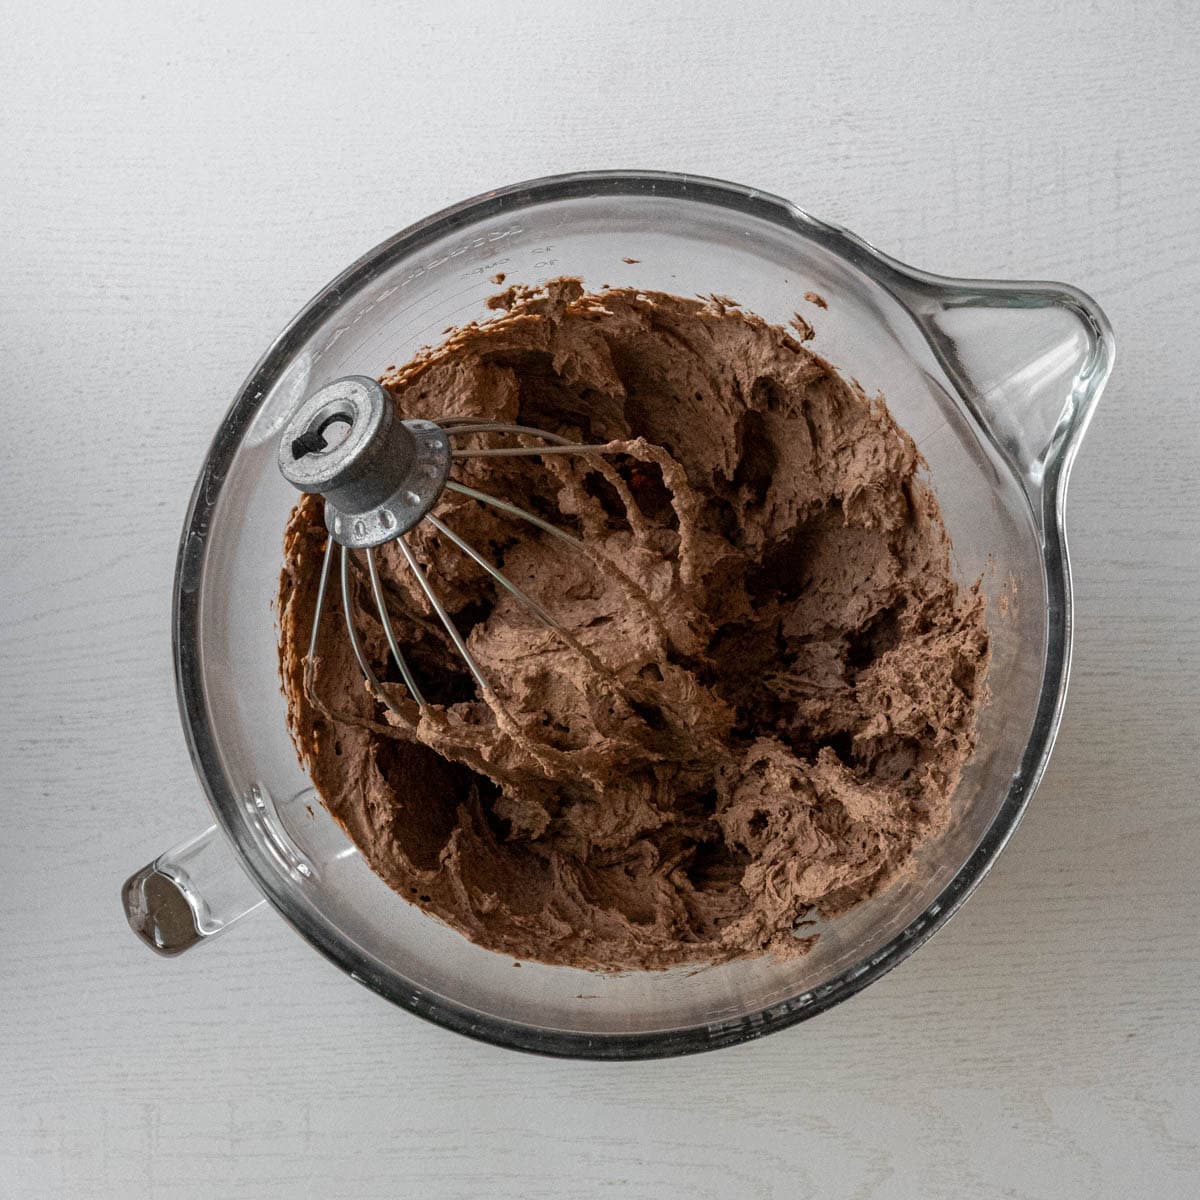
Step 2: Make the chocolate pudding - While the brownies chill, add the pudding mix, cocoa powder, heavy cream, and milk to a large bowl. Whip until the mixture is thick, light, and mousse-like.
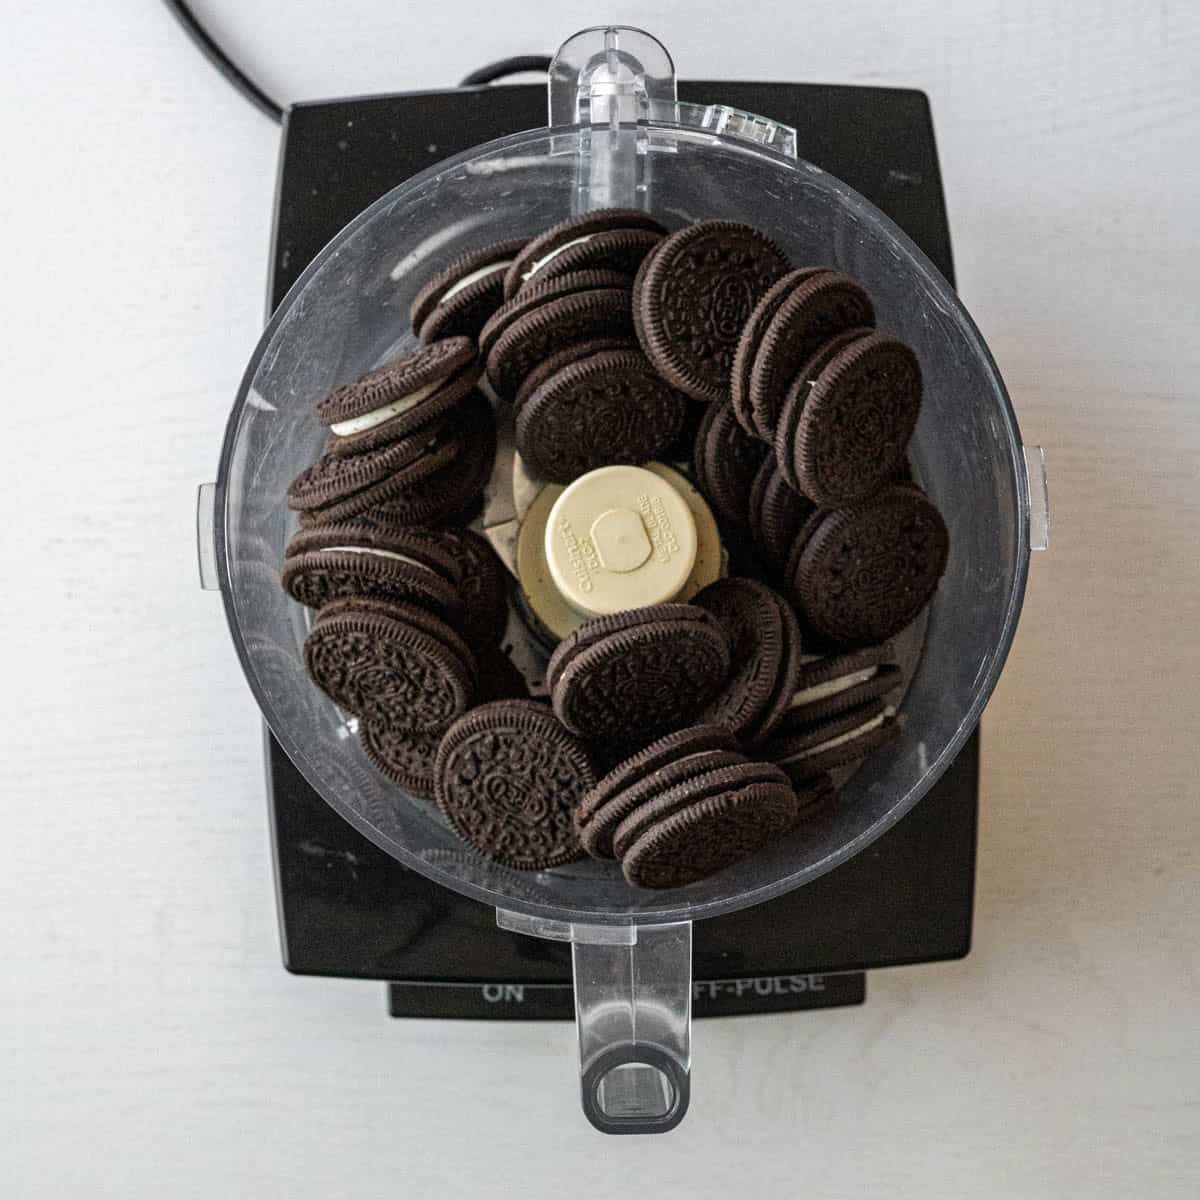
Step 3: Prep the dirt layer - Crush the Oreos into fine crumbs using a food processor or a zip-top bag and rolling pin.
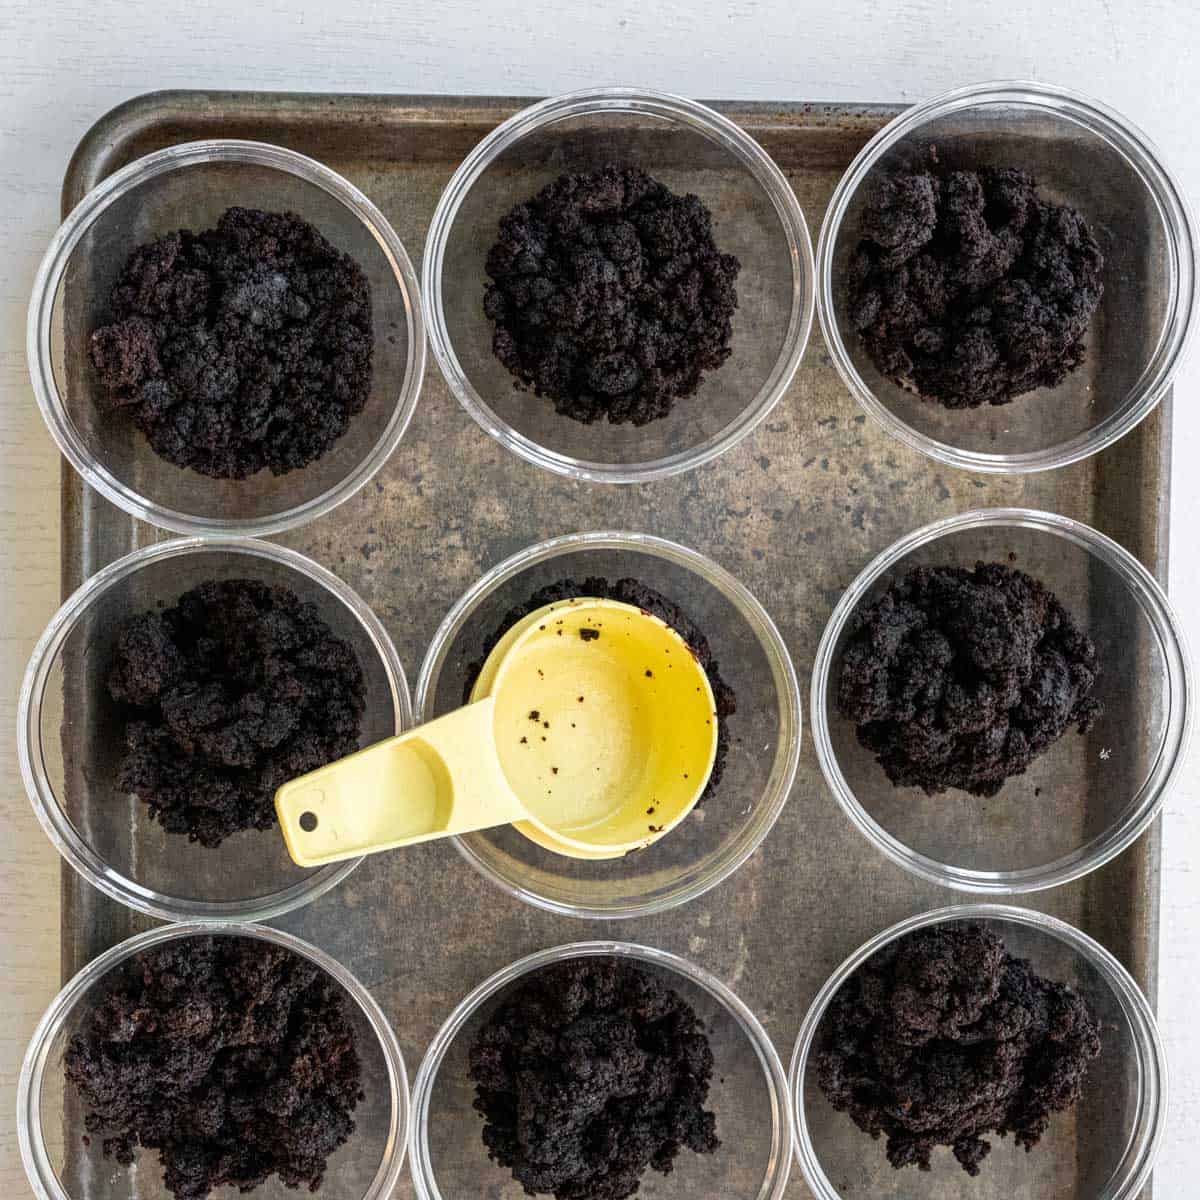
Step 4: Set up your cups - Place 9-ounce plastic cups (12 cups total), small half pint mason jars, or your preferred serving cups on a baking sheet to make assembly easier.
Add a layer of brownie into the cup. Press into the cup for a clean layered look.
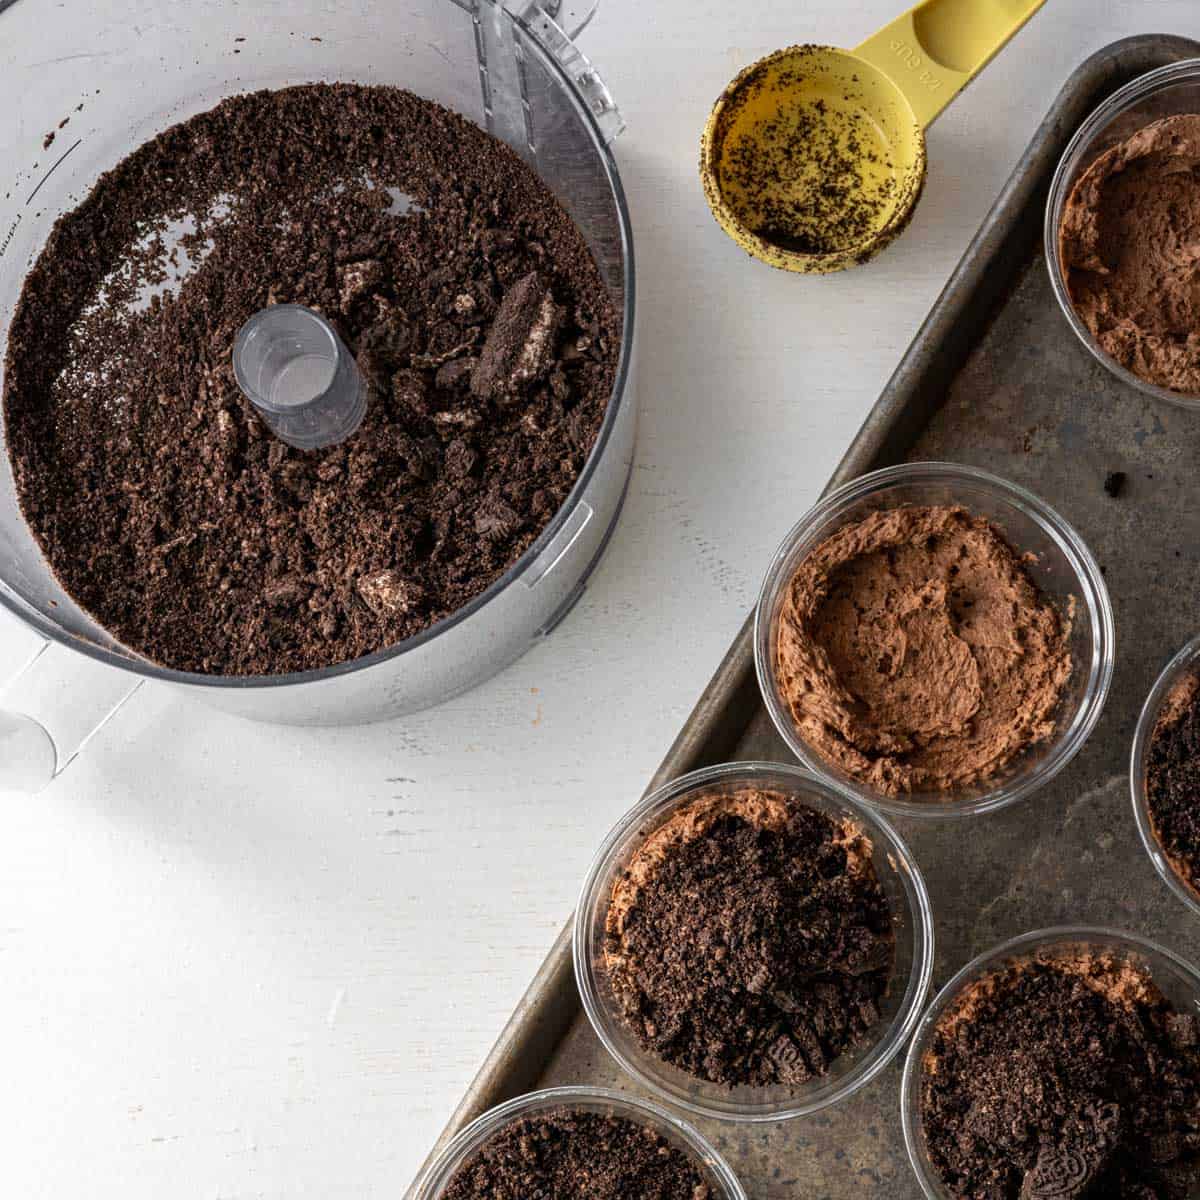
Step 5: Assemble the layers - Next, add a spoonful of chocolate mousse. Sprinkle crushed Oreos over the mousse.
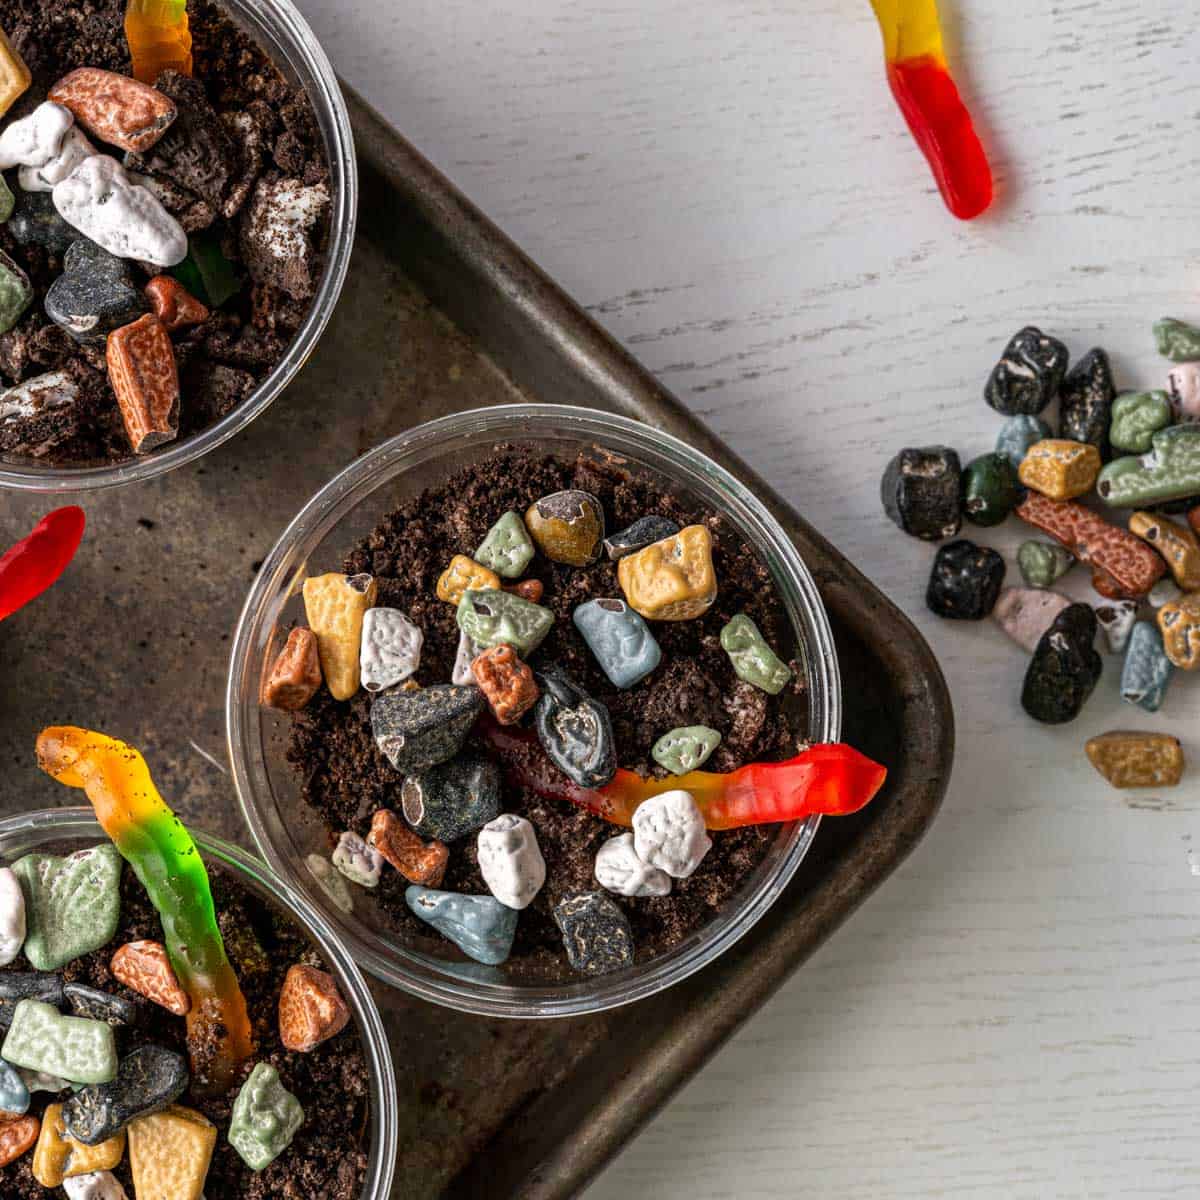
Step 6: Finish and chill - Top each cup with gummy worms and candy rocks. Refrigerate for 15 to 30 minutes before serving so the layers set.
Tips and Tricks
Patience is key - Make sure the brownies are cooled completely. Otherwise, the warm brownies will melt the chocolate mousse, creating a mudslide.
No heavy cream? Use milk, anything but skim, and make the pudding. The texture will be less mousse-like and more like pudding. It is equally delicious.
Want a classic dirt cake? Whipping the pudding with heavy cream gives it a mousse-like texture, but milk-only pudding works perfectly if you prefer the traditional version.
Skip sour gummy worms - While I love some sour candy, do not use sour-flavored gummy worms for this recipe. Sour coatings clash with the chocolate flavors.
Crushing cookies - This is a great opportunity to enlist helpers! Put the Oreos into a zip-top bag and hand your kids a large wooden spoon. If they are "too helpful" maybe double-bag the cookies in case the bag breaks, because life.
Special Diet Variations
Gluten free: Use a gluten free brownie mix and gluten free chocolate sandwich cookies. Choose a certified gluten free pudding mix if needed.
Low FODMAP: Use lactose free dairy and check candy ingredients for high fructose corn syrup. (Detailed low FODMAP notes are below.)
Dairy free: Use a dairy free brownie mix and swap the heavy cream for full-fat unsweetened coconut cream.
Storing and Make Ahead
Store: Leftover dirt cake cups can be stored covered in the refrigerator for up to 2 days. The layers will soften slightly, but the flavor stays rich and chocolatey.
Make ahead: These dirt cake cups can be assembled up to 24 hours in advance. For best results, add gummy worms and candy rocks just before serving since cold gummy worms can be hard to chew.
Low FODMAP Notes
Low FODMAP ingredient information is based on the Monash University Food App and FODMAP Friendly App testing results as of the day posted. As always, modify based on your gut and what works for you on a low FODMAP diet.
- Brownies: Use a gluten free brownie mix if fructans are not tolerated.
- Pudding + Unsweetened Cocoa Powder: Use an option that doesn't include wheat or any sweeteners that have high FODMAPs.
- Dairy: Use lactose free milk and lactose free heavy cream, or for a less dairy option, use a can of unsweetened full fat coconut cream.
- Cookies: Use gluten free Oreos or a brand of cookie you can tolerate.
- Candy: Use a gummy worm that doesn't contain any high FODMAP sweeteners like high fructose corn syrup.
For additional information on a low FODMAP diet, please visit Monash University or FODMAP Friendly. Both have websites and apps for additional guidance and testing results.
FAQs
You can assemble dirt cake cups up to 24 hours in advance and store them covered in the refrigerator. For best results, add gummy worms and candy rocks just before serving.
Absolutely. Homemade brownies work well as long as they are fully cooled before crumbling and layering.
No. This recipe uses a chocolate mousse made with heavy cream rather than whipped topping for a richer, airier texture.
Small plastic cups (9 ounces) or half-pint mason jars work best. Individual portions are easier to serve and transport.
Yes. Use small, tall cups and adjust the layers to fit. Taller, narrower containers make it easier to fit more dirt cake cups on a baking sheet and store them neatly in the refrigerator for parties.
Yes. Try vanilla pudding with golden Oreos and sprinkles for a birthday cake version.
Store leftovers covered in the refrigerator for up to 2 days. The layers may soften slightly, but still taste great.
Freezing is not recommended. The mousse and toppings do not thaw well and can lose their texture.
When To Serve Dirt Cake Cups
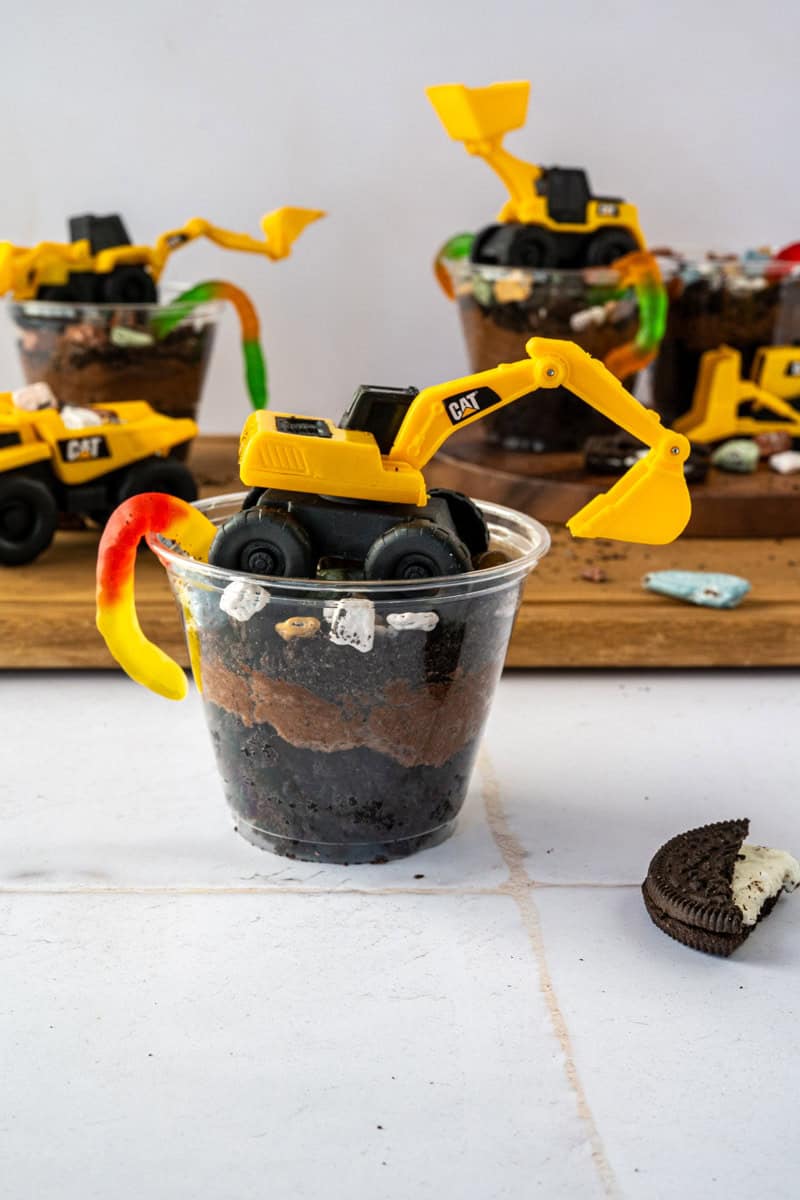
Construction-Themed Parties
Top each cup with a small toy construction vehicle. They add instant theme appeal and double as party favors. Bonus: this also works for a farm-themed party! Just use tractors and combines.
Earth Day Desserts
Use different cookies like Golden Oreos, Chips Ahoy, Nutter Butters to create layers that mimic the Earth's crust and make dessert educational.
Halloween Treats
Lean into a spooky vibe with plastic spiders, simple "RIP" headstones made from Milano cookies, and gel frosting.
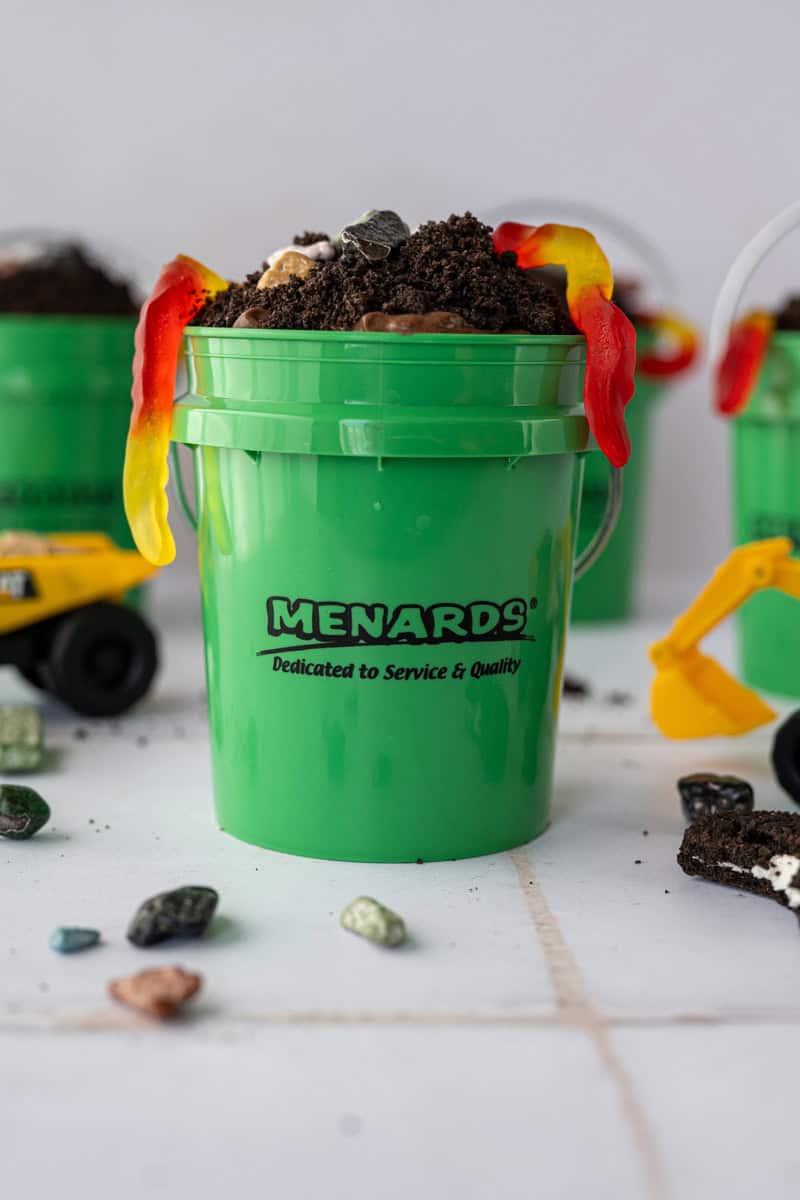
Mini Pail Party Cups
Serve the dirt cake cups in mini Menards pails for extra cuteness. You lose the layered look, but the tiny buckets and handles are worth it. Bonus: they come with covers!
More Loveable Dessert Recipes
Love This Recipe?
Leave a ⭐⭐⭐⭐⭐ rating + comment. It helps so much, and we love hearing from everyone! Thank You -Venessa
Recipe
Dirt Cake Cups
Equipment
Ingredients
Brownie Layer:
- 16 ounces boxed brownie mix + ingredients to make brownies (Note 1)
Pudding Layer:
- 5.9 ounces instant chocolate pudding mix big box (Note 2)
- 2 tablespoons unsweetened cocoa powder
- 2 cups heavy whipping cream (Note 3)
- ½ cup milk (Note 4)
Dirt Layer:
- 12 ounces Oreos (Note 5)
- 8 ounces gummy worms not sour
- 16 ounces candy rocks
Instructions
- Bake the brownies according to the package instructions. Cool for 15 minutes, then use a fork to crumble the brownies. Spread the crumbs on a baking sheet and refrigerate until completely cool.
- While the brownies cool, prepare the pudding layer. In a large bowl, add the pudding mix, cocoa powder, heavy cream, and milk. Whip until light and fluffy.
- Crush the Oreo cookies into fine crumbs using a food processor or a zip-top bag. A food processor creates an even crumb, or crush the cookies in a zip-top bag.
- Place plastic cups or small mason jars on a baking sheet. Add a layer of cooled brownie crumbs to the bottom of each cup (¼ cup), followed by a spoonful of the pudding mixture (about ⅓ cup).
- Sprinkle with crushed Oreos (¼ cup) and a handful of candy rocks, then top with gummy worms.
- Refrigerate for 15 to 30 minutes before serving.


Venessa Mandelkow says
We are going to make these for my son's graduation party we loved them so much!