
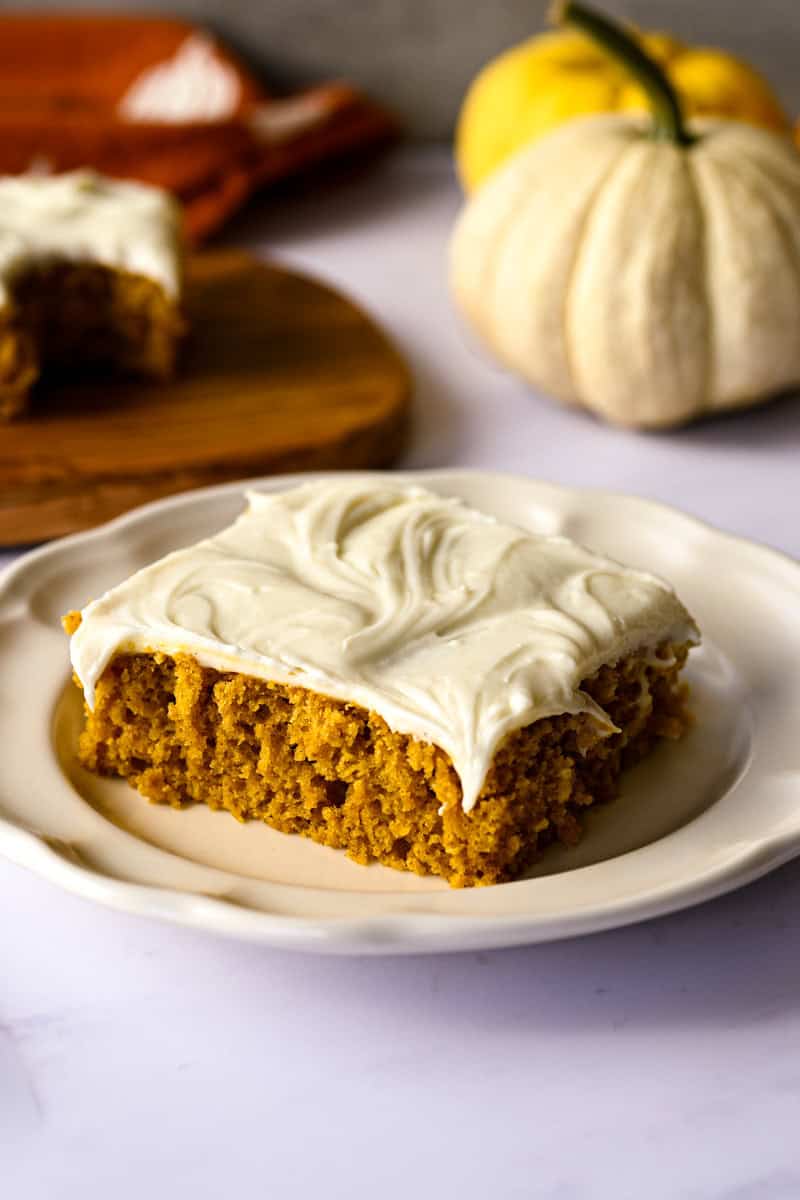
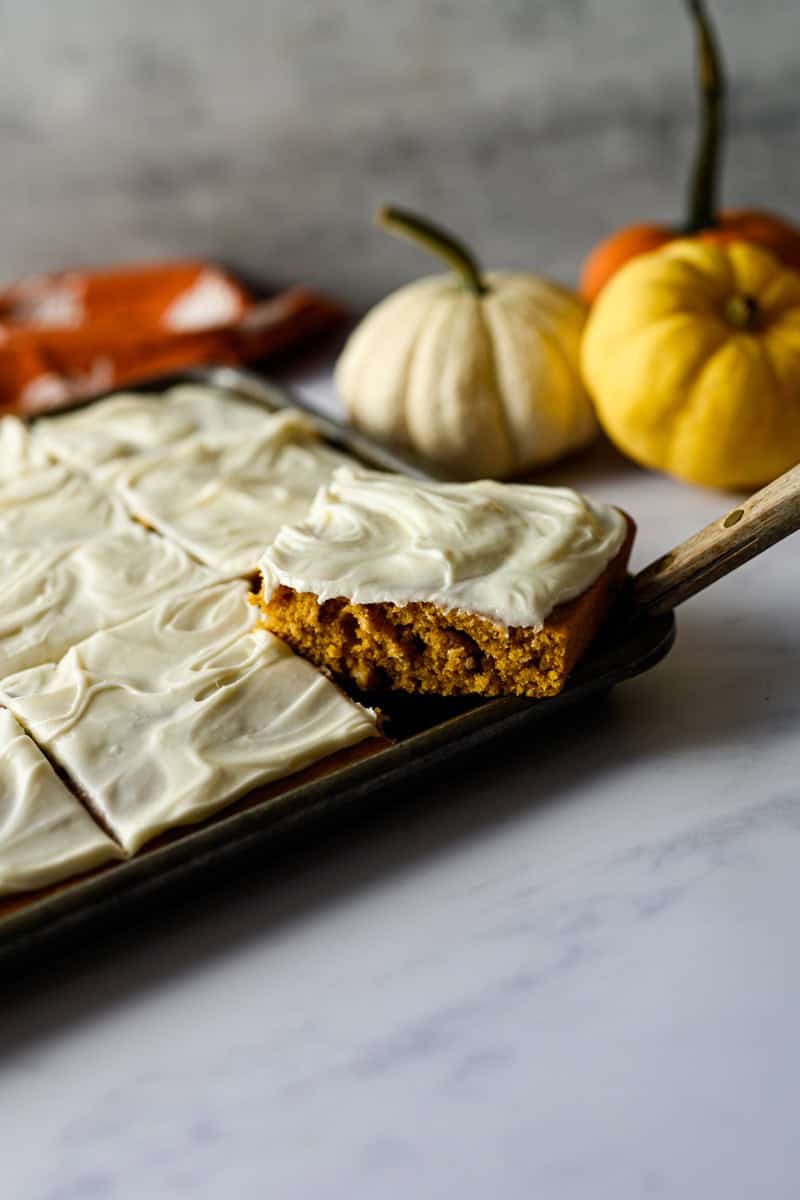
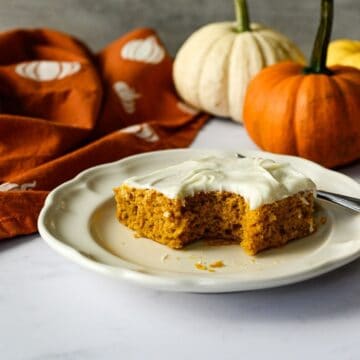
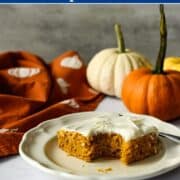
Around here, gluten free pumpkin bars disappear faster than I can cut them. The moist, pumpkin cake with warm spices and not-too-sweet cream cheese frosting makes it a family favorite, perfect for after-school snacks, potlucks, or sneaking a square with your morning coffee.
My rule for baking is simple: if it isn't easy, it isn't happening. These easy gluten free bars are right at home with other favorites like pumpkin pudding cake, gluten free fruit pizza and Nutella puppy chow. Check out my gluten free baking recipes for more sweets that are simple, flavorful, and seem to disappear faster than I can make them.
Jump to:
Why You'll Love This Recipe
- Cake-Like Texture - Soft, moist, and perfectly spiced… like pumpkin cake, but easier to cut into tidy squares.
- Balanced Cream Cheese Frosting - Tangy, creamy, and not too sweet, so it complements the pumpkin instead of overpowering it.
- Banana for Moisture - A ripe banana stands in for part of the oil in my Grandma Jean's original recipe, so the bars stay tender without being heavy.
What You'll Need
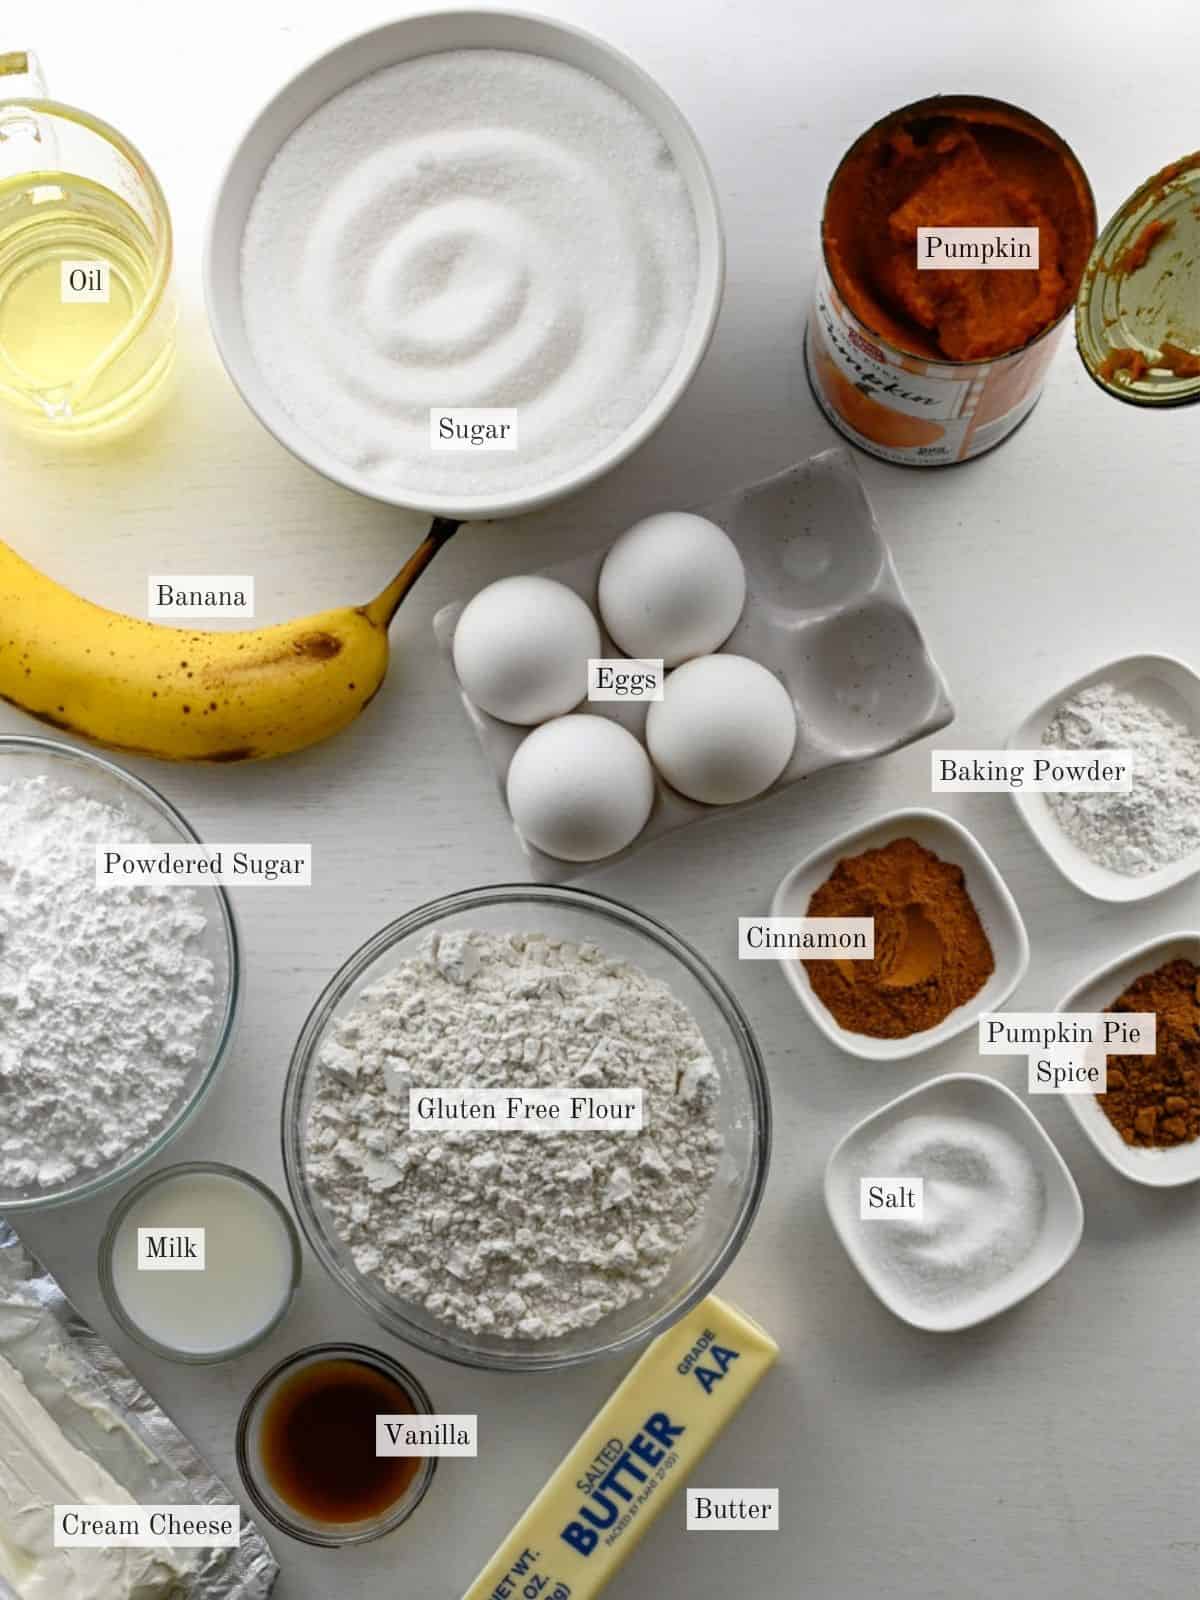
- Ripe Banana - Adds natural sweetness and moisture while cutting back on oil. Don't worry, it won't make these taste like banana bread - it just keeps the bars soft and tender.
- Vegetable Oil - A little extra fat keeps the texture light and prevents the bars from drying out. Oil makes them stay moist for days.
- Eggs - These are the backbone of the batter, helping everything bind together and rise into that fluffy, cake-like texture.
- Sugar - Balances the earthy pumpkin and spices with just the right amount of sweetness.
- Canned Pumpkin - The star ingredient! Pumpkin brings rich flavor, natural sweetness, and that cozy fall vibe we all wait for every year.
- Gluten Free Flour - A 1:1 baking blend keeps these bars light and cake-like. I love Bob's Red Mill 1-to-1 gluten free flour in the blue bag.
- Baking Powder - Gives the bars their lift and fluff, so they don't turn out dense.
- Cinnamon and Pumpkin Pie Spice - The warm, cozy flavors that make pumpkin desserts shine. They make your kitchen smell like fall in the best way.
- Cream Cheese - Tangy and rich, it perfectly balances the sweet pumpkin bars. Use block-style cream cheese for the creamiest results.
- Butter - Adds richness and helps the frosting whip up light and fluffy.
- Powdered Sugar - Sweetens the frosting while keeping it smooth and silky.
- Milk - Loosens the frosting just enough to spread easily.
- Vanilla Extract - A little vanilla rounds everything out and deepens the flavor.
See the recipe card for the exact measurements and complete instructions.
Selected ingredients are based on guidance on current serving sizes measured by the Monash University Food App and FODMAP Friendly App at the time of publishing. As always, follow your gut and modify as needed.
Step-By-Step Instructions
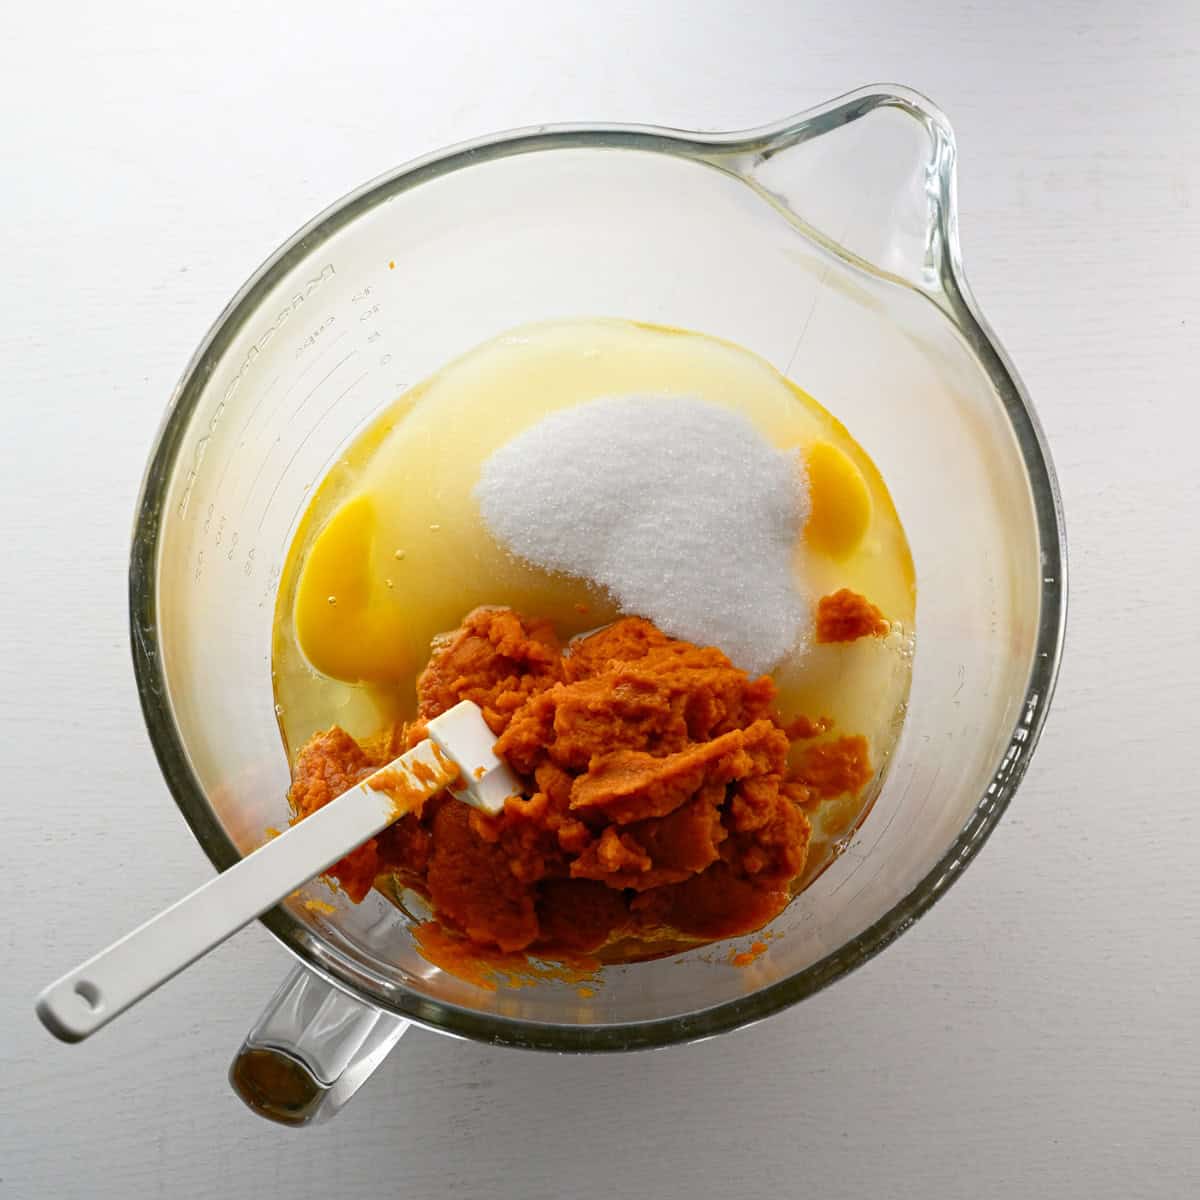
Step 1: Mix the wet ingredients
In a large bowl or stand mixer, beat the ripe banana until smooth. Add vegetable oil and eggs, then mix in the sugar and pumpkin puree until well combined.
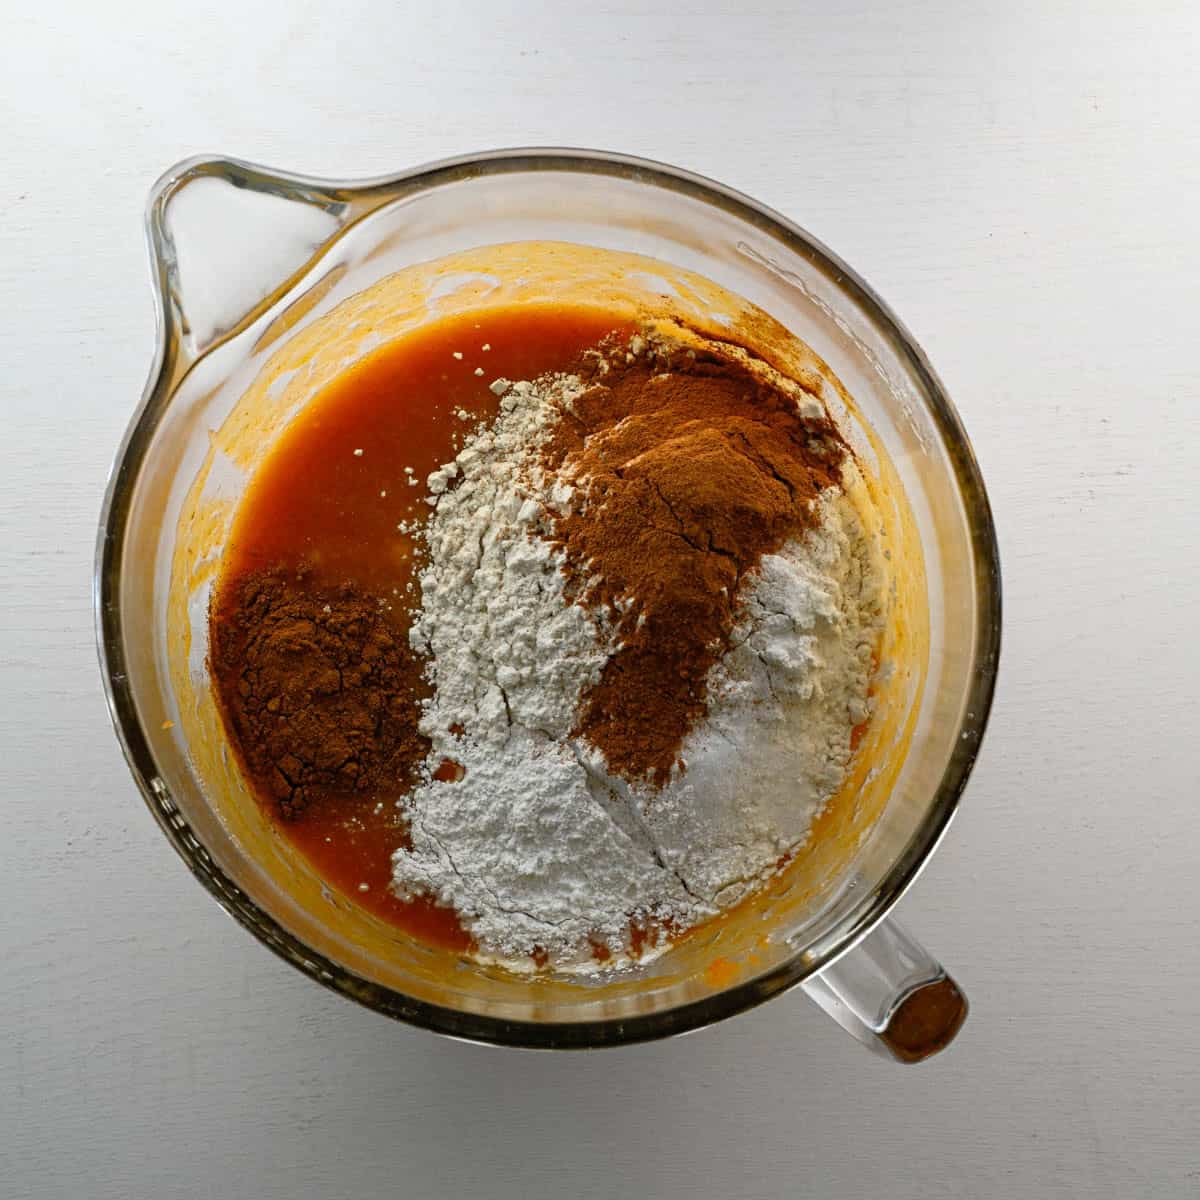
Step 2: Add the dry ingredients
Stir in the gluten free flour, sea salt, baking powder, cinnamon, and pumpkin pie spice until the batter is smooth and no streaks of flour remain.
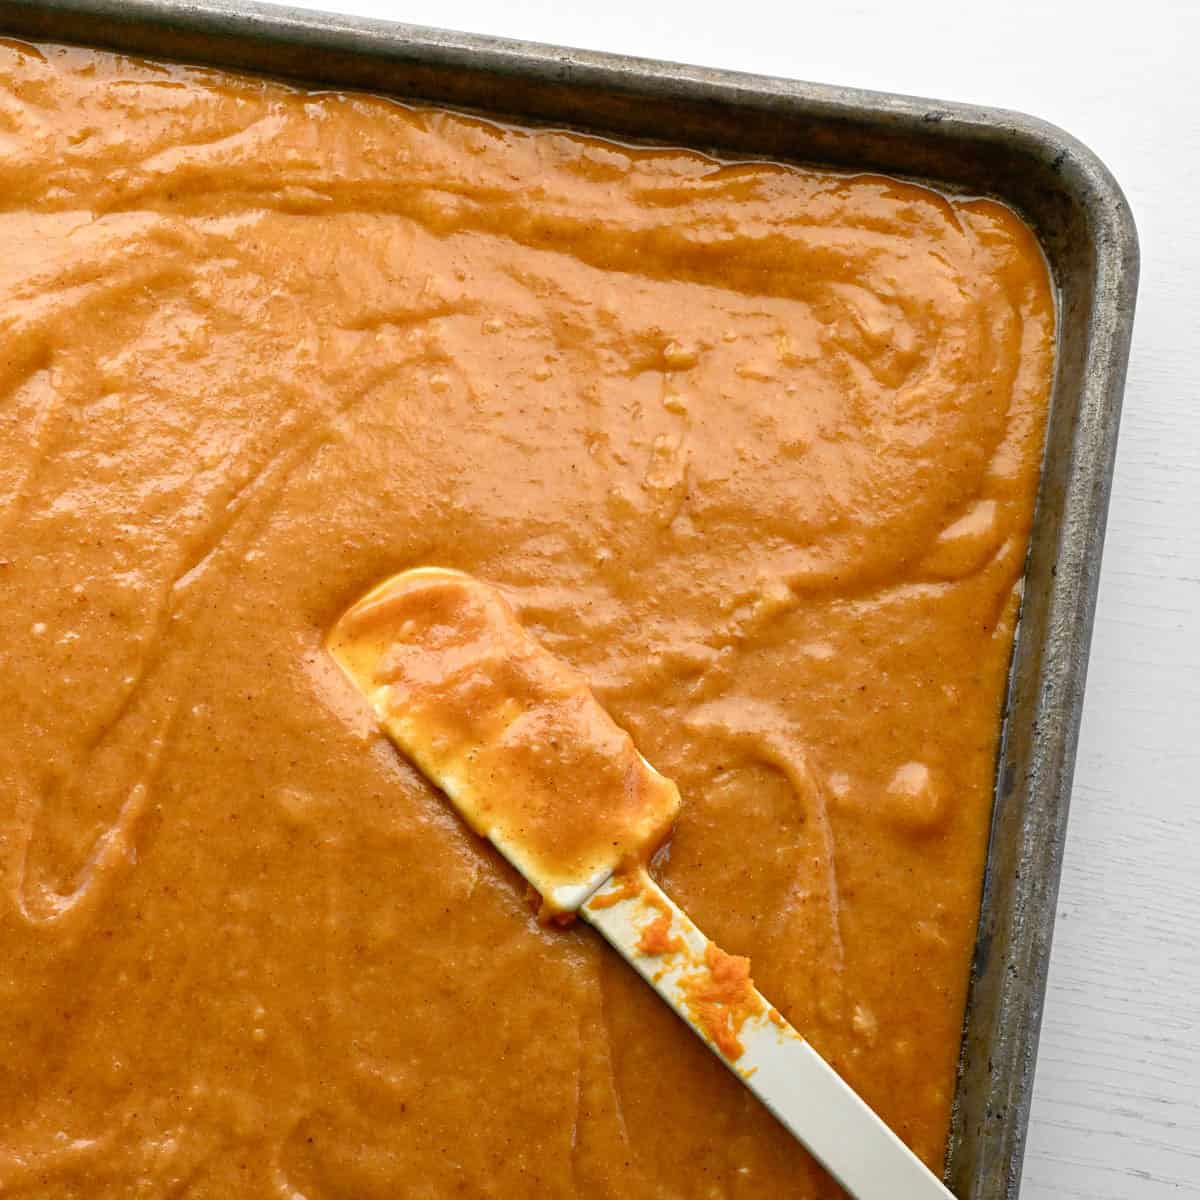
Step 3: Bake and cool
Pour the batter into a prepared jelly roll pan and spread evenly. Bake at 350 degrees F for 25-30 minutes, or until a toothpick inserted in the center comes out clean.
Let the bars cool completely in the pan before frosting.
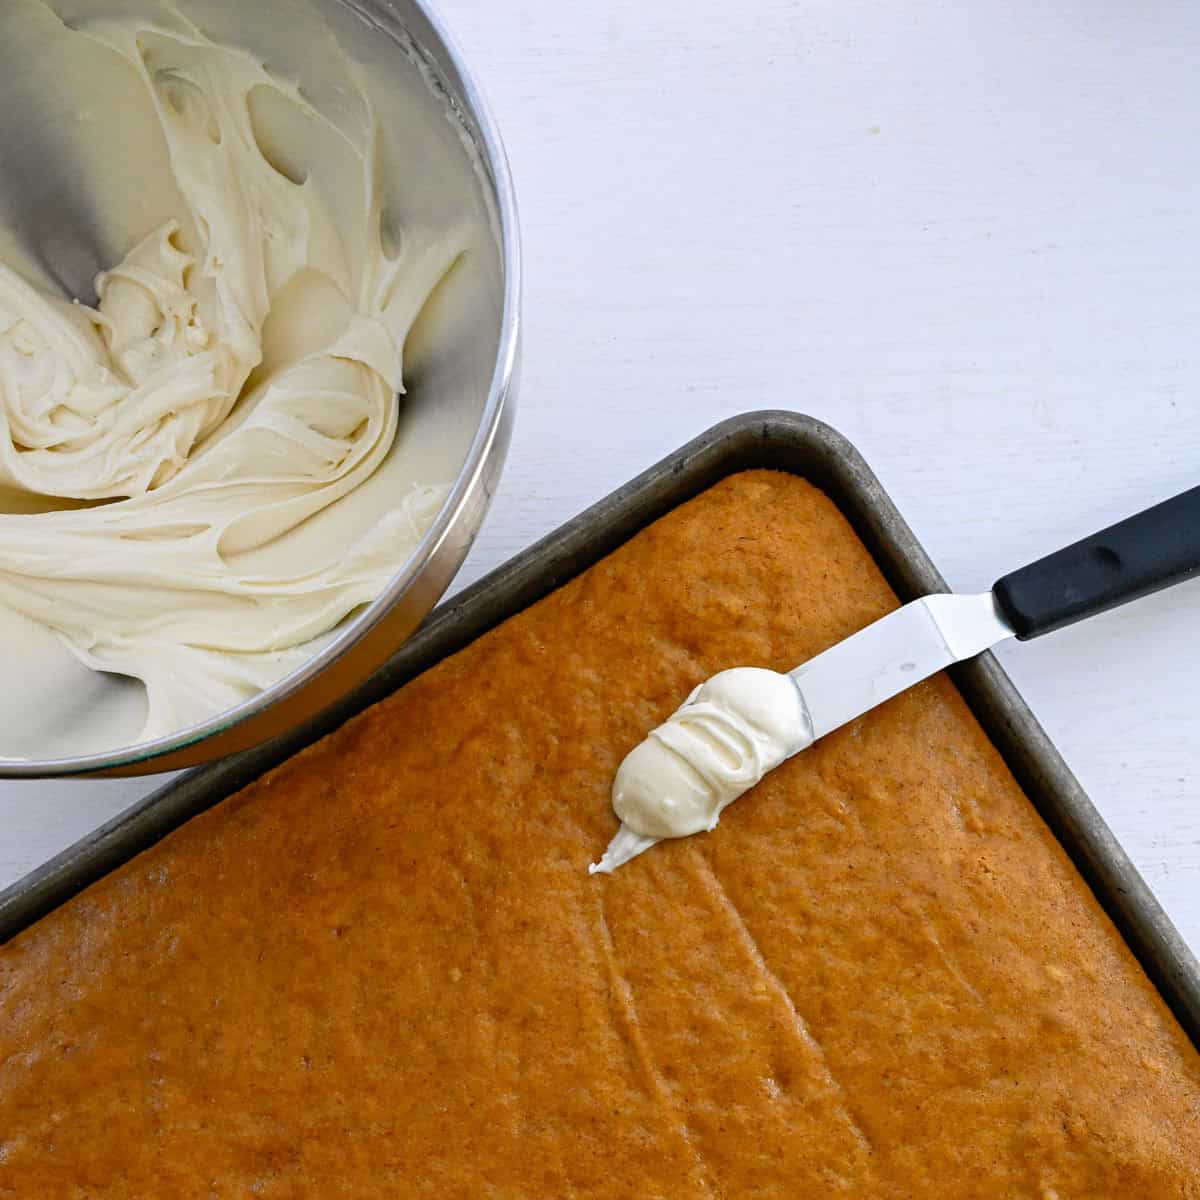
Step 4: Frost and finish
Beat cream cheese and butter until smooth. Add powdered sugar, milk, and vanilla, and mix until creamy.
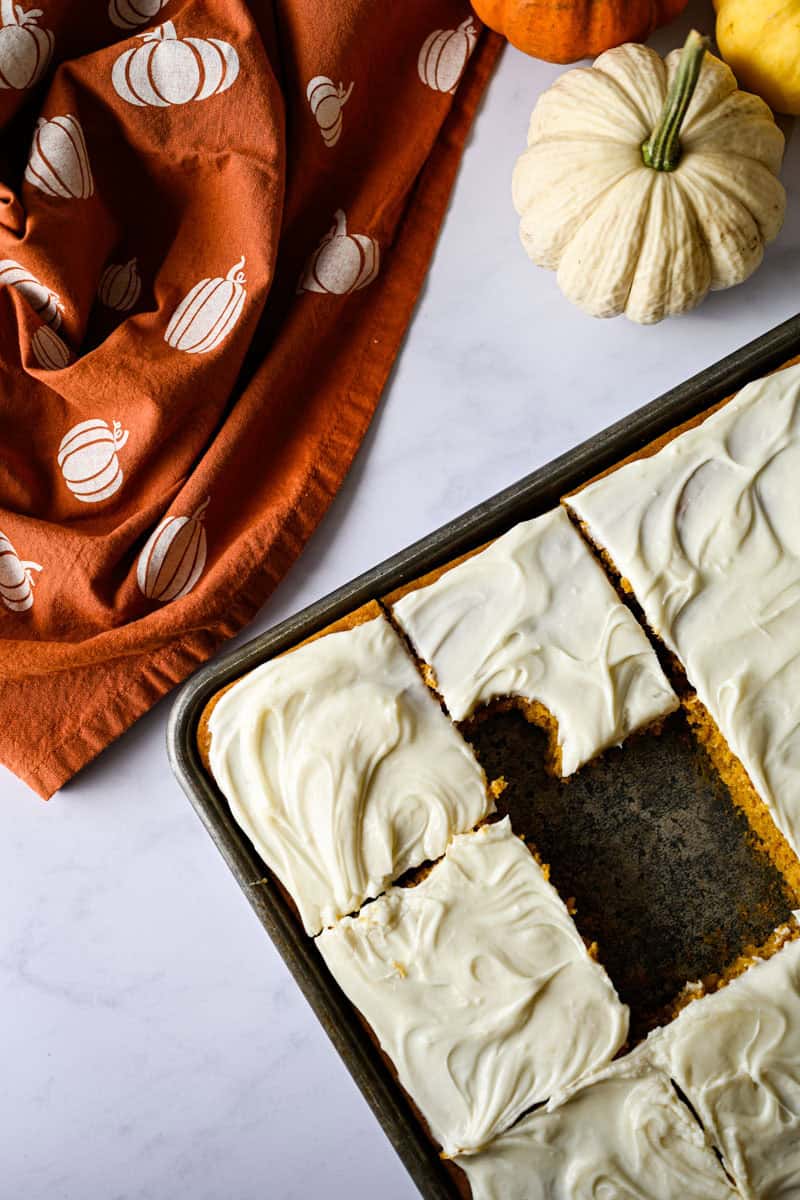
Spread frosting over the cooled bars, then refrigerate before cutting into squares. Store leftovers in an airtight container in the fridge.
Tips and Tricks
No Banana, No Problem! If you don't have a ripe banana on hand, just increase the vegetable oil to 1 cup. The bars will still turn out moist and tender.
Cold Cream Cheese and Cold Butter? Cold ingredients can cause lumpy frosting. Make sure the cream cheese and butter are softened before making the frosting.
Pan Size Matters! A jelly roll pan gives you classic thinner bars. For thicker slices, use a 9x13-inch pan and add a few extra minutes to the bake time.
Cool Completely! Make sure the pumpkin bars are cooled completely. Otherwise, you will have a melty, cream cheese frosting mess, not ideal.
Storage Tip! These bars are best stored covered in the fridge. They also freeze beautifully - just slice, wrap individually, and thaw in the fridge before serving.
Special Diet Variations
Dairy Free Pumpkin Bars: Use dairy-free cream cheese, dairy-free butter sticks, and your favorite plant-based milk for the frosting. The bars stay just as moist and flavorful.
Low FODMAP Pumpkin Bars: Choose lactose-free cream cheese and milk. If you want, use cooled kabocha pumpkin puree which Monash has tested to be safe at ⅓ cup (75 grams) per meal. Canned pumpkin is at ⅓ cup (75 grams) per meal.
Nut Free Pumpkin Bars: This recipe is naturally nut free as written. Just double-check your gluten free flour blend and dairy-free substitutes if using.
FAQs
Yes! Swap the cream cheese and butter in the frosting for dairy-free versions, and use your favorite plant-based milk. The bars stay just as moist, and the frosting still turns out creamy.
Since they're topped with cream cheese frosting, yes, they should be stored in the fridge. They'll stay fresh for about 4-5 days.
Yes, for 1-2 hours while serving, but leftovers should be kept in the refrigerator.
Absolutely. You can freeze them unfrosted for up to 3 months, or freeze frosted bars individually for about 2 months. Thaw in the fridge before serving.
A ripe banana helps replace some of the oil, keeping the bars soft and tender without being heavy. Don't worry, it won't make them taste like banana bread - it just adds subtle moisture and sweetness.
Yes! If you don't have a banana on hand, simply increase the vegetable oil to 1 cup. The bars will still bake up moist and fluffy.
Yes, bake a day in advance and then frost the next day. For a gluten free dessert, they hold up better than most.
What's the difference between pumpkin bars and pumpkin cake?
Pumpkin bars are typically baked thinner in a jelly roll pan and cut into squares, while pumpkin cake is thicker and usually baked in a 9x13-inch pan or layered.
You can, but you'll need to roast and puree the pumpkin until smooth, then strain excess liquid. Canned pumpkin is more consistent and gives the most reliable results.
Yes! Stick to ⅓ cup (75 grams) per meal.
Storing and Freezing
Storing: Once frosted, keep pumpkin bars covered in the refrigerator. They'll stay fresh for 4-5 days. The cream cheese frosting softens a little as they sit, but the flavor just gets better.
Freezing (unfrosted): Bake the bars, cool completely, and wrap tightly in plastic wrap, then foil. Freeze up to 3 months. Thaw in the fridge overnight before frosting.
Freezing (frosted): Slice into bars, then place on a baking sheet to flash-freeze until firm. Wrap individually and store in an airtight container for up to 2 months. Thaw in the fridge and enjoy cold or let them come to room temperature before serving.
Low FODMAP Notes
Low FODMAP ingredient information is based on the Monash University Food App and FODMAP Friendly App testing results as of the day posted. As always, modify based on your gut and what works for you on a low FODMAP diet.
- Canned Pumpkin - Safe at ⅓ cup (75 grams) per meal
- Kabocha Pumpkin - Also safe at ⅓ cup (75 grams) per serving if you prefer homemade puree. Make kabocha pumpkin in the Instant Pot!
- Dairy Swaps - Use lactose-free cream cheese and milk to keep the frosting low FODMAP.
For additional information on a low FODMAP diet, please visit Monash University or FODMAP Friendly. Both have websites and apps for additional guidance and testing results.
When To Serve Pumpkin Bars
These are perfect for any fall occasion. Serve this easy pumpkin dessert at Thanksgiving or Friendsgiving, pack them up for Halloween parties, or slice them small for after-school snacks. They're also a hit at bake sales and potlucks, and sometimes you just need a cozy weekend bake that makes the whole house smell like pumpkin spice.
More Loveable Pumpkin Recipes
- Dairy Free Pumpkin Soup - Creamy, cozy, and full of fall flavor thanks to coconut milk and warm spices.
- Chicken Tortilla Soup with Pumpkin - A hearty classic with tender chicken, fire-roasted tomatoes, and a hint of pumpkin sweetness.
- Pumpkin Pie with Coconut Milk - Silky smooth, dairy free, and everything you want in a holiday pumpkin pie.
Love This Recipe?
Leave a ⭐⭐⭐⭐⭐ rating + comment. It helps so much, and we love hearing from everyone! Thank You -Venessa
Recipe
Gluten Free Pumpkin Bars
Equipment
- Jelly Roll Pan
Ingredients
- 1 medium sized ripe banana ½ cup (Note 1)
- ½ cup vegetable oil (Note 2)
- 4 large eggs
- 2 cups white granulated sugar
- 15 ounces canned pumpkin puree (Note 3)
- 2 cups gluten free flour (Note 4)
- 2 teaspoons sea salt
- 2 teaspoons baking powder
- 2 teaspoons ground cinnamon
- 1 teaspoon pumpkin pie spice
Cream Cheese Frosting:
- 8 ounces cream cheese softened
- ¼ cup butter softened
- 2 cups powdered sugar
- 2 tablespoons milk
- 1 teaspoon vanilla extract
Instructions
- Preheat the oven to 350 degrees F. Lightly coat a jelly roll pan with nonstick cooking spray.
- In a large mixing bowl or stand mixer, beat the ripe banana until smooth. Add the vegetable oil and eggs, stirring until combined.
- Mix in the sugar and pumpkin puree. Beat on low speed for 1-2 minutes, until the sugar is dissolved.
- Add the gluten free flour, sea salt, baking powder, cinnamon, and pumpkin pie spice. Stir until the batter is smooth and no streaks of flour remain.
- Pour the batter into the prepared pan and spread evenly. Bake for 25-30 minutes, or until a toothpick inserted in the center comes out clean.
- Remove from the oven and let the bars cool completely before frosting.
- For the frosting, beat the softened cream cheese and butter together until smooth. Add powdered sugar, milk, and vanilla. Mix until creamy with no lumps. (If your cream cheese or butter wasn't fully at room temperature, small lumps may remain, but the frosting will still taste delicious.)
- Spread the frosting evenly over the cooled bars with an offset spatula. Refrigerate until set. Once cut, store bars in an airtight container in the refrigerator to keep them fresh.
Notes
- Jelly Roll Pan (15 x 10 inches, 1-inch sides): Yields classic thin pumpkin bars with the perfect layer of frosting.
- 9x13 Baking Pan: Makes thicker, more cake-like bars. Add extra baking time.
- Half Sheet Pan (18 x 13 inches): Produces very thin bars that bake quickly. Double the frosting so you have enough to cover the surface.


Venessa Mandelkow says
Love these with a cup of coffee in the morning! I cannot even tell they are gluten free!